
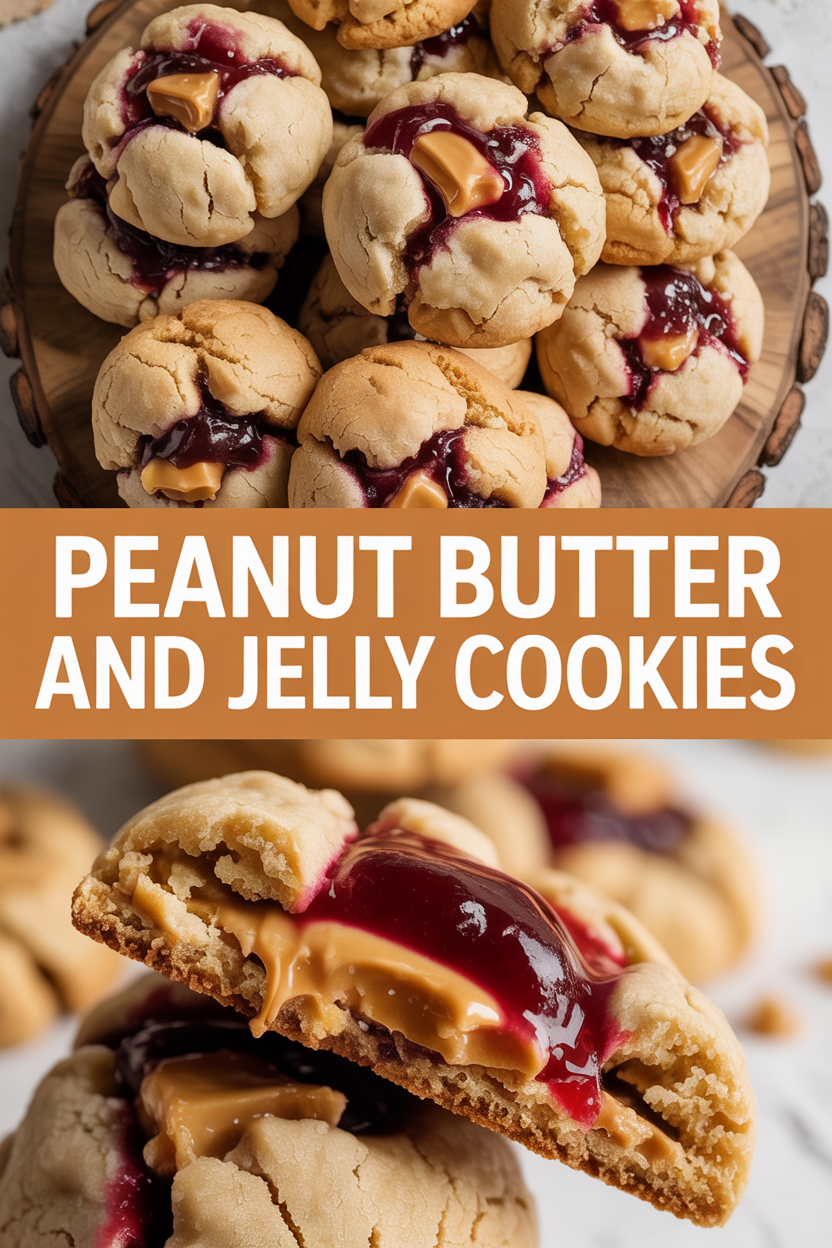
Whenever I smell warm peanuts and sticky jam, I fall right back into my grandma’s tiny kitchen: flour-dusted countertops, a radio playing something from the ’70s, and a wooden spoon that always managed to find my sleeve. She taught me how to press my thumb into dough and fill it with gooey jelly, and the rule was simple — you licked your finger if no one watched. These Peanut Butter and Jelly Cookies capture that exact moment: crunchy, a little salty, with a sweet ruby center that oozes when you bite. They feel like lunchbox nostalgia dressed up for cookie plates — perfect for kids, picnics, or a selfish afternoon snack when you deserve a treat.
Quick Facts
- Yield: Serves 24 cookies
- Prep Time: 15 minutes (plus optional chill time)
- Cook Time: 10–12 minutes
- Total Time: 35–45 minutes
Why This Recipe is Awesome
I love these because they hit the comfort-food jackpot: the nutty richness of peanut butter, the tender crumb of a classic cookie, and a sweet, slightly tangy jam center that makes every bite sing. Texture plays tag here — crisp edges, soft centers, and sticky jewel-like jam. They stay simple, use pantry staples, and sneak a little nostalgia into your day. Plus, they’re so easy even your oven can’t mess them up.
Ingredients
For the Main Dish:
- 1 cup (8 oz) creamy peanut butter — use stirred natural if you like, but see notes
- 1/2 cup (1 stick) unsalted butter, softened
- 1/2 cup granulated sugar
- 1/2 cup light brown sugar, packed
- 1 large egg
- 1 tsp vanilla extract
- 1 1/4 cups all-purpose flour
- 1/2 tsp baking soda
- 1/4 tsp salt (omit if your peanut butter is very salty)
- 1/2 cup jam or preserves (strawberry, grape, or raspberry)
For the Sauce / Garnish (if applicable):
- Optional: 1/4 cup extra jam warmed slightly for prettier filling
- Optional: 2 tbsp melted chocolate for drizzling
- Optional: flaky sea salt for sprinkling
How I Make It
Step 1:
Preheat the oven to 350°F and line baking sheets with parchment. In a bowl, beat 1/2 cup softened butter with 1/2 cup granulated sugar and 1/2 cup brown sugar until creamy and paler in color — you’ll smell warm caramel notes. Add 1 cup peanut butter, the egg, and 1 tsp vanilla, and beat until smooth. If your peanut butter clumps, scrape the bowl and beat a little longer.
Step 2:
Whisk together 1 1/4 cups flour, 1/2 tsp baking soda, and 1/4 tsp salt in a separate bowl. Add the dry mix to the peanut butter mixture and stir just until combined — don’t overmix or the cookies will tighten up. If the dough feels very soft, chill it 20–30 minutes to firm up; cold dough holds shape better and gives you chewier centers.
Step 3:
Scoop about 1 tablespoon of dough per cookie and roll into balls. Press each ball gently with your thumb or the back of a small spoon to create a well for the jam. You want a nice hollow, not a tear-through to the tray. The dough will give a satisfying little crackle as you press — that’s the texture forming.
Step 4:
Fill each indentation with about 1/2 teaspoon of jam. If the jam is stiff, warm it 10–15 seconds in the microwave to make it pipe-friendly. Bake at 350°F for 10–12 minutes, until the edges turn golden and the centers look set but glossy. The kitchen will smell like toasted peanuts and sugar — irresistible.
Step 5:
Let the cookies cool on the baking sheet for 5 minutes, then transfer to a wire rack to finish cooling. If you like, drizzle with melted chocolate or dust with flaky sea salt for a grown-up twist. Serve slightly warm so the jam stays gooey, or let them cool completely for firm centers.
Pro Tips
- Use room-temperature butter to cream properly; cold butter makes clumpy dough.
- If your dough spreads too much, chill 20–30 minutes before baking — colder dough holds shape and yields chewier middles.
- Warm jam slightly to fill wells neatly; thick jam stays put better than runny jelly.
- Rotate pans halfway through baking for even browning if your oven runs hot.
Common Mistakes to Avoid
- Skipping preheating: Classic rookie move. It changes texture and bake time.
- Overmixing: Leads to dense or chewy results. Mix until just combined.
- Guessing cook time: Always use visual cues or a timer, not just vibes.
- Overcrowding pans: Give your food some breathing room to crisp properly.
Alternatives & Substitutions
- Nut-free option: swap peanut butter for sunflower seed butter (keeps the nutty flavor without peanuts).
- Gluten-free: use a 1:1 gluten-free flour blend — expect a slightly crumblier texture.
- Dairy-free: replace butter with vegan butter or coconut oil, keeping textures similar.
- Sugar swaps: try coconut sugar for a deeper flavor; expect darker color and slight caramel notes.
Variations & Tips
- Add mini chocolate chips to the dough for PB&J with melty pockets.
- Press a fork crosshatch on top for classic peanut butter cookie vibes before making the thumbprint.
- Make sandwich cookies: bake smaller cookies, spread jam between two, and press edges into chopped peanuts.
- Use flavored nut butters (honey-roasted, cinnamon) for a quick twist on flavor.
- Stir a pinch of cinnamon or cardamom into the dough for a warm, cozy note.
- Try salted caramel instead of jam for an indulgent adult version.
FAQ (Frequently Asked Questions)
- Can I make this ahead of time?
- Yes! Scoop the dough and freeze on a tray for up to 2 months. Thaw on the counter for 15–20 minutes before pressing wells and filling with jam, then bake as directed. Store baked cookies in an airtight container for up to 3 days, or refrigerate up to a week.
- Can I double the recipe?
- Sure thing. Use two baking sheets and rotate them halfway through baking for even color. Keep the same 350°F temperature and watch cook time; you’ll likely still bake for 10–12 minutes, but the middle rack stays most consistent.
- Can I substitute butter with oil?
- Technically yes, but you’ll miss that buttery magic. Use ¾ the amount of oil and expect slightly flatter, less tender cookies.
- How do I know it’s done?
- Bake until the edges show a light golden color and the jam looks glossy but set. The cookie center should look slightly firm; it will continue to set as it cools. If the edge browns too much before the center sets, lower the oven by 10–15°F next batch.
- What if I don’t have ingredient X?
- No panic—swap all-purpose flour with a gluten-free blend, use sunflower seed butter for peanut-free homes, or trade brown sugar for coconut sugar. Each swap nudges texture and flavor, but the cookie spirit stays intact.
How I Like to Serve It
I love these slightly warm with a tall glass of cold milk — total comfort. They also shine on a picnic plate alongside carrot sticks, or tucked into lunchboxes for a surprise treat. For brunch, pair them with coffee and a smear of extra jam on the side. In winter, add a cup of hot cocoa and call it a cozy celebration.
Notes
- Store in an airtight container at room temperature for up to 3 days, or freeze baked cookies up to 1 month.
- If you use natural peanut butter (oil separated), stir thoroughly and reduce added salt. No meat temperatures to worry about here!
Final Thoughts
Closing: Go make a batch, press your thumb into the dough, and steal a warm one straight from the tray — nostalgia guaranteed. Now go impress someone — or just yourself — with your homemade masterpiece!