
Alright, real talk: nobody has time for complicated recipes on a busy weeknight, but everyone deserves a little garlic-buttery joy at the end of a long day. These garlic breadsticks are my go-to lifesaver — they’re quick, ridiculously tasty, and make your kitchen smell like you’ve been baking in an Italian bakery all day. Picture this: warm, fluffy sticks with golden, crispy edges and that garlicky butter seeping into every nook and cranny. The kind of breadsticks that disappear faster than you can say “dinner’s ready.” Seriously, these are so easy to pull together, even if you’re juggling homework, Zoom calls, or just trying to remember why you walked into the kitchen. Trust me, your taste buds and your busy schedule will thank you!
Quick Facts
- Yield: Serves 6–8
- Prep Time: 15 minutes
- Cook Time: 15 minutes
- Total Time: 30 minutes
Why This Recipe is Awesome
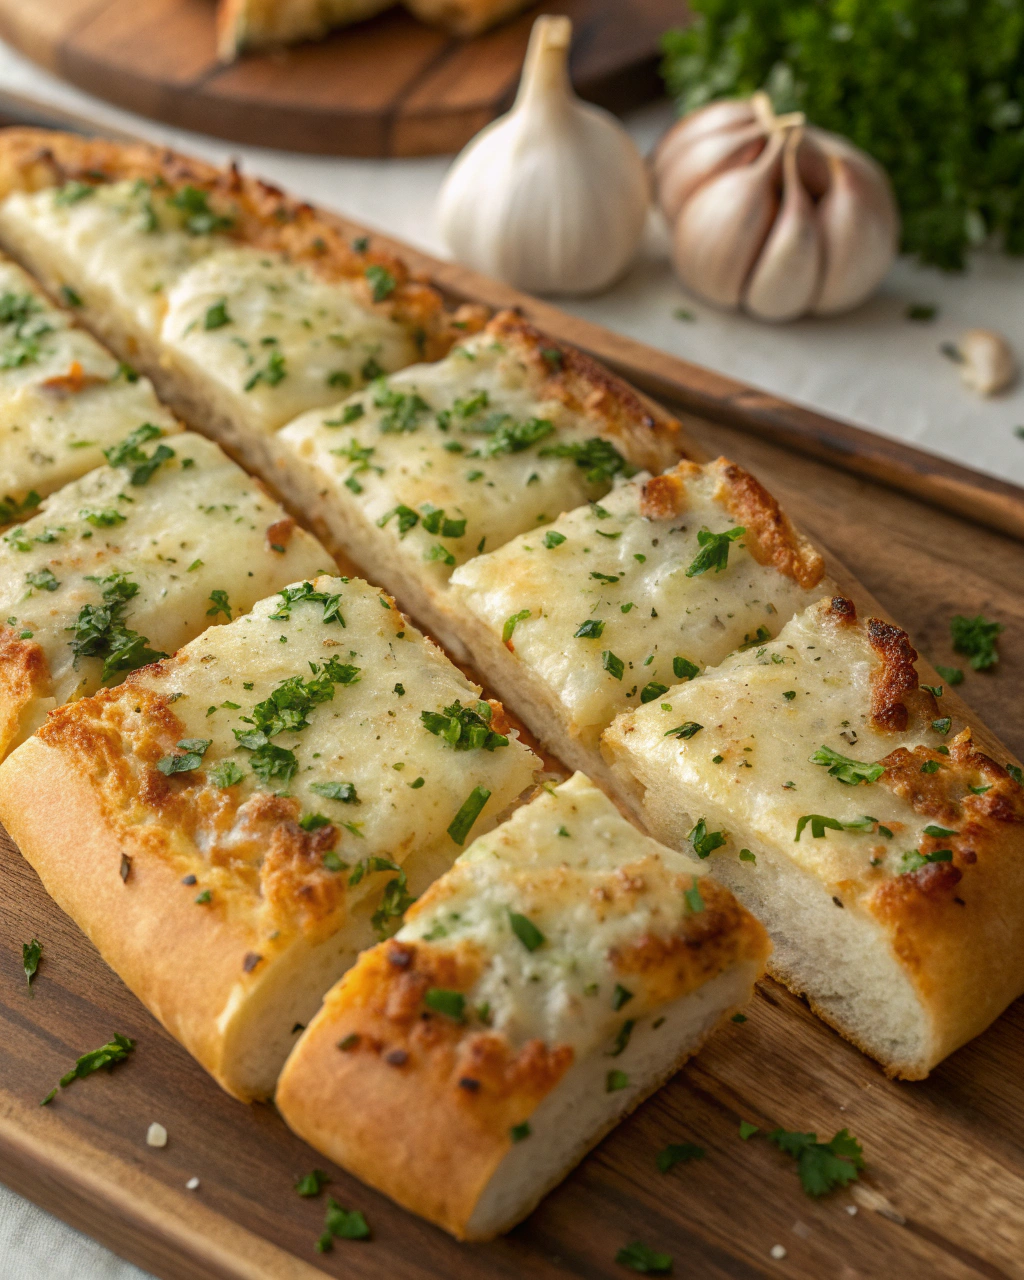
This recipe hits all the right notes: soft and pillowy on the inside, slightly crunchy on the outside, and dripping with buttery, garlicky goodness. Plus, it’s so straightforward that your oven practically does most of the work. It’s the kind of breadstick everyone loves, because who can say no to warm bread bursting with garlic flavor? Whether you’re pairing it with pasta, dipping it in marinara, or just eating it straight off the pan while no one’s watching—these breadsticks bring comfort and joy to your weeknight table. Also, they’re a total crowd-pleaser and disappear almost instantly, so consider making extra!
Ingredients
For the Main Dish:
- 2 ¼ tsp (1 packet) active dry yeast
- 1 cup warm water (about 110°F)
- 2 tbsp granulated sugar
- 2 ½ cups all-purpose flour
- 1 tsp salt
- 2 tbsp olive oil
For the Garlic Butter Topping:
- 4 tbsp unsalted butter, melted
- 3 cloves garlic, minced (or finely grated)
- 1 tsp dried parsley (optional, but it makes things look fancy!)
- ½ tsp salt
How I Make It
Step 1:
First up, let’s wake that yeast up! In a small bowl, combine the warm water, sugar, and yeast. Give it a gentle stir and let it sit for about 5 minutes until it’s foamy and bubbly. If it doesn’t foam, your yeast might be old or the water too hot or cold—don’t worry, just start over with fresh yeast and water around 110°F.
Step 2:
While the yeast is doing its thing, grab a large bowl and whisk together your flour and salt. Once the yeast’s bubbly, pour it in along with the olive oil. Stir everything together until it starts to come together as a rough dough.
Step 3:
Now, flour your hands and knead the dough directly in the bowl or on a lightly floured surface for about 7–8 minutes. You want it to be smooth, elastic, and just a little tacky (not sticky, so add flour sparingly if it’s too wet). This is the part where your dough transforms and gets that lovely stretchiness—kind of a workout, but highly satisfying!
Step 4:
Lightly oil your bowl and place the dough inside, turning once to coat all sides. Cover with a clean kitchen towel or plastic wrap and let it rise somewhere warm for about 1 hour, until it’s doubled in size. You’ll smell that yeasty, sweet aroma starting to develop—it’s the good stuff coming alive!
Step 5:
Once it’s puffed up like a soft pillow, punch the dough down and roll it out into a rectangle about 10×12 inches. Slice it into 12 strips, then place them on a parchment-lined baking sheet, spaced about 1 inch apart so they don’t merge into one giant bread-braid.
Step 6:
Whisk together your melted butter, garlic, salt, and parsley. Brush this mixture generously over every breadstick. This is where your kitchen fills with that mouthwatering garlic butter smell that’s basically impossible to resist.
Step 7:
Bake the breadsticks in a preheated oven at 400°F for about 12–15 minutes. You want them to be a beautiful golden-brown with slightly crisp edges. If your kitchen smells anything like mine right now, you’re on the right track!
Step 8:
Once out of the oven, brush them once more with any leftover garlic butter and let them cool just a minute or two—hot enough to melt faces, but cool enough to enjoy immediately without a mouth full of molten lava.
Pro Tips
- Use warm (not hot) water to activate your yeast—too hot and you’ll kill it, too cold and it won’t activate properly.
- Don’t over-knead your dough—it should bounce back when poked gently, but not feel tough.
- Brush on garlic butter right before and right after baking for maximum flavor punch.
- If you want extra cheesy breadsticks, sprinkle a little shredded mozzarella or Parmesan right before baking.
Common Mistakes to Avoid
- Skipping preheating: Classic rookie move. It changes texture and bake time.
- Overmixing: Leads to dense or chewy results. Mix until just combined.
- Guessing cook time: Always use visual cues or a timer, not just vibes.
- Overcrowding pans: Give your food some breathing room to crisp properly.
Alternatives & Substitutions
- Can’t find active dry yeast? Instant yeast works perfectly — just skip proofing and mix directly with flour.
- Use vegan butter or olive oil instead of butter for dairy-free breadsticks, though the flavor will be slightly different (less rich but still tasty!).
- Swap all-purpose flour for whole wheat for a nuttier texture, but add an extra 1–2 tbsp of water as whole wheat absorbs more.
Variations & Tips
- Spicy Kick: Add a pinch of red pepper flakes into the garlic butter for some heat.
- Herb Lover: Mix in fresh chopped rosemary or basil instead of parsley for different garden-fresh notes.
- Cheesy Delight: Top with shredded mozzarella or Parmesan before baking for a gooey twist.
- Kid-Friendly Fun: Brush with butter and sprinkle a little cinnamon sugar for a sweet version kids will love.
- Garlic Knots: Instead of sticks, tie the dough strips into knots for cute, pull-apart bites.
FAQ (Frequently Asked Questions)
- Can I make this ahead of time?
- Absolutely! You can prepare the dough the night before, let it rise slowly in the fridge, then shape and bake fresh the next day. For baked breadsticks, store in an airtight container and rewarm in the oven at 350°F for about 5 minutes before serving.
- Can I double the recipe?
- Sure thing. Use a larger bowl and baking sheet or two pans, but keep the same rising and baking times. Just make sure not to crowd the pans!
- Can I substitute butter with oil?
- Technically yes, but you’ll miss that buttery magic. Use about ¾ the amount of olive oil and consider adding a pinch of garlic powder for flavor.
- How do I know it’s done?
- Look for golden edges that are lightly crisp and a firm-but-soft texture when you tap. The smell will be irresistible, too!
- What if I don’t have ingredient X?
- If you’re out of parsley, dried Italian herbs or even a bit of oregano work fine. No fresh garlic? Garlic powder is a decent backup—use about ½ tsp for 3 cloves.
How I Like to Serve It
I love pulling these breadsticks out alongside a big bowl of my favorite pasta or a cozy soup. They’re the ultimate sidekick for dinner, perfect for dipping in marinara or whatever sauce your heart desires. They also shine at potlucks because everyone reaches for seconds (and thirds!). When summer rolls around, they’re just as great alongside grilled chicken or salads. Bonus points for pairing with a chilled glass of white wine or sparkling water with lemon—you know, to keep things classy!
Notes
- Store leftover breadsticks in an airtight container at room temp for up to 2 days, or freeze for up to 1 month.
- Reheat at 350°F wrapped in foil to keep them soft, about 5-7 minutes.
Final Thoughts
Now go impress someone — or just yourself — with your homemade masterpiece! There’s nothing quite like the glow of pulling warm, garlicky breadsticks out of the oven on a hectic weeknight. Happy baking!