
I’m going to say something wildly honest: I once made these stuffed peppers to impress a date and ended up falling in love with the dish more than the date. That tells you everything you need to know — these peppers cozy up to cheesy, savory chicken in a way that makes the kitchen smell like a hug. They crackle as they bake, the cheese bubbles, and the peppers roast to sweet, slightly charred perfection. If you want comfort food that looks fancy but takes almost no elbow grease, this is your new weeknight hero. Also, they travel well to potlucks and silence critics faster than you can say “more cheese, please.”
Quick Facts
- Yield: Serves 4
- Prep Time: 15 minutes
- Cook Time: 25–30 minutes
- Total Time: 40–45 minutes
Why This Recipe is Awesome
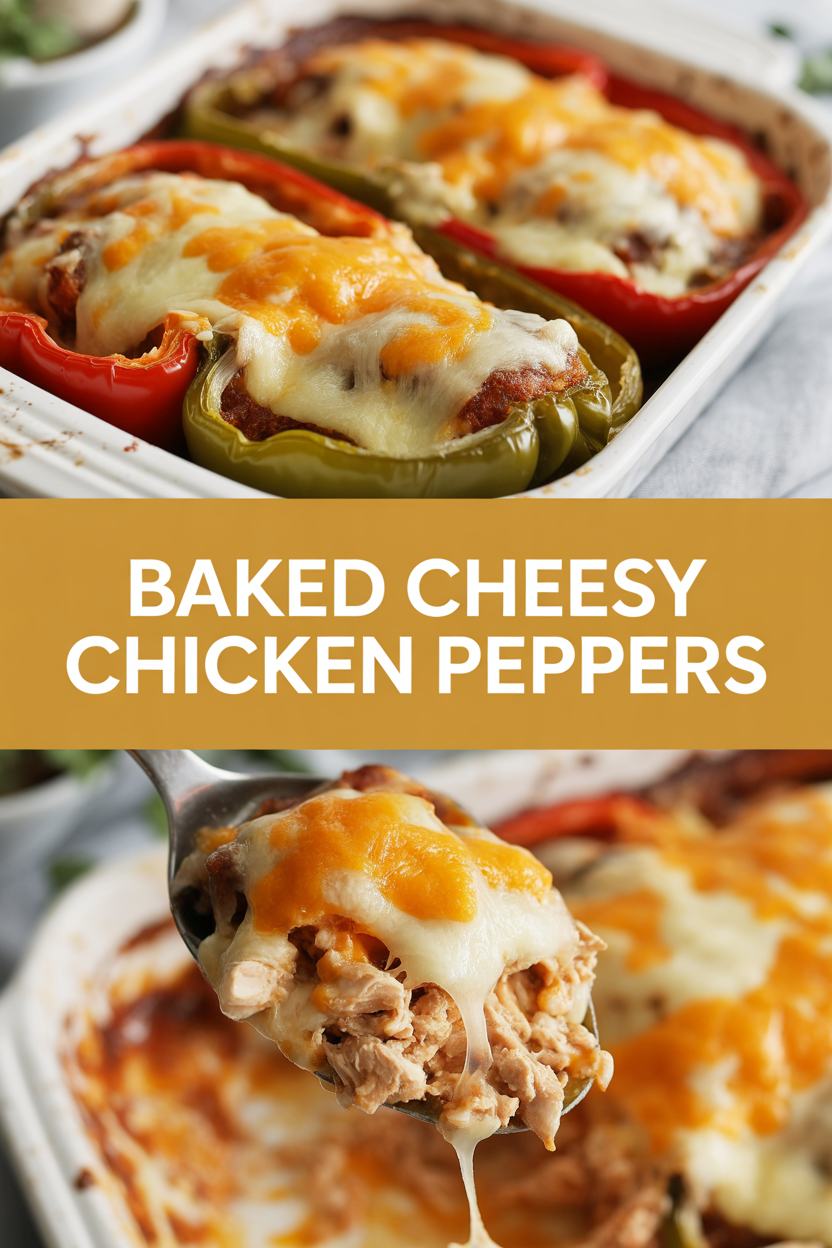
It’s basically cheesy, savory chicken tucked into sweet, roasted bell peppers — a hand-held comfort dish without the frying or fuss. You get gooey melted cheese, a juicy chicken filling, and peppers that hold their shape but get tender and slightly charred on the edges. It’s so easy even your oven can’t mess it up. Plus, the aroma of garlic, roasted pepper, and bubbling cheese will make your whole house stop scrolling and come to the table.
Ingredients
For the Main Dish:
- 4 large bell peppers (mixed colors if you want a party)
- 1 lb ground chicken (or use shredded rotisserie chicken — see subs)
- 1 small yellow onion, finely chopped (about 3/4 cup)
- 2 cloves garlic, minced
- 1 tbsp olive oil
- 1 tsp paprika
- 1 tsp dried oregano
- 1/2 tsp chili powder (optional for a little warmth)
- 1/2 tsp kosher salt and 1/4 tsp black pepper, or to taste
- 1/2 cup diced tomatoes (canned drained or fresh)
- 1/2 cup breadcrumbs or panko (use gluten-free if needed)
- 1/2 cup plain Greek yogurt or 2 oz cream cheese for creaminess
- 1 cup shredded cheddar cheese (reserve 1/2 cup for topping)
- 1/2 cup shredded mozzarella (optional, for stringy melt)
- Fresh parsley or cilantro, chopped, for garnish
For the Sauce / Garnish (if applicable):
- Optional drizzle: 1 tbsp olive oil + squeeze of lemon or a spoonful of salsa verde
How I Make It
Step 1:
Preheat your oven to 400°F. Cut the tops off the bell peppers and remove seeds and membranes. Stand each pepper in a rimmed baking dish so they don’t tip. If they wobble, slice a thin sliver off the bottom to level them — no drama. Your oven will smell faintly like anticipation when it reaches temperature.
Step 2:
Heat 1 tbsp olive oil in a skillet over medium-high heat. Add the chopped onion and sauté until soft and glossy, about 3–4 minutes. Toss in the garlic and stir until fragrant, another 30 seconds — that garlic smell will make you want to eat immediately. Add the ground chicken, breaking it up with a spatula. Sprinkle in the paprika, oregano, chili powder, salt, and pepper.
Step 3:
Cook the chicken until no pink remains and it pulls apart into little crumbles — about 6–8 minutes. Stir in the diced tomatoes, breadcrumbs, and the creamy element (Greek yogurt or cream cheese). Fold in 1 cup cheddar and 1/2 cup mozzarella if using. Taste and adjust seasoning — this is the moment to add more salt or a pinch of sugar if your tomatoes taste acidic. The filling should feel slightly sticky and hold together when you press it with a spoon.
Step 4:
Spoon the warm filling into each pepper, packing gently but not overstuffing. Sprinkle the reserved 1/2 cup cheddar over the tops so the cheese blankets the filling and gets beautifully golden. Bake at 400°F for 20–25 minutes, until the peppers soften and the cheese bubbles. For a crackly top, switch to broil and toast for 2–3 minutes — watch closely so it doesn’t burn.
Step 5:
Remove the peppers and let them rest for 5 minutes — this helps the filling settle and keeps everything juicy. Garnish with chopped parsley or cilantro, a drizzle of olive oil or lemon, and a grind of pepper. Serve warm and listen for the satisfied sighs.
Pro Tips
- Use a thermometer: the chicken filling should reach 165°F for safety and juiciness.
- If your peppers cook unevenly, slice them in half lengthwise and lay them cut-side up for quicker roasting and easier eating.
- Swap ground chicken for shredded rotisserie chicken to shave off 10–15 minutes of cook time and add extra flavor.
- Want crispier edges? Roast the peppers cut-side down on a sheet pan first for 10 minutes, then turn up and stuff and finish baking.
Common Mistakes to Avoid
- Skipping preheating: Classic rookie move. It changes texture and bake time.
- Overmixing: Leads to dense or chewy results. Mix until just combined.
- Guessing cook time: Always use visual cues or a timer, not just vibes.
- Overcrowding pans: Give your food some breathing room to crisp properly.
Alternatives & Substitutions
- Protein swap: Use firm tofu (crumbled and sautéed) or shredded rotisserie chicken. Tofu gives a softer texture; rotisserie keeps it juicy and fast.
- Dairy swap: Use dairy-free shredded cheese and vegan cream cheese or mashed avocado for a creamy finish.
- Breadcrumbs: Replace with crushed tortilla chips or cooked quinoa for a gluten-free option; quinoa adds a nutty texture.
- For a lower-fat option: Swap Greek yogurt for cream cheese — yogurt lightens the dish and adds tang but reduces richness.
Variations & Tips
- Make it Mexican: Add taco seasoning, black beans, corn, and top with cilantro and lime.
- Kid-friendly: Skip the chili powder, use mild salsa, and load on the cheddar.
- Vegetarian: Replace chicken with a mix of sautéed mushrooms, lentils, and walnuts for a meaty texture.
- Spicy twist: Stir in chopped pickled jalapeños or red pepper flakes for a kick.
- Italian twist: Use marinara, Italian seasoning, and swap cheddar for provolone and parmesan.
- Creative twist: Add a spoonful of pesto to the filling for a herby surprise.
FAQ (Frequently Asked Questions)
- Can I make this ahead of time?
- Yes! Prepare the filling and store it in an airtight container in the fridge for up to 2 days. Stuff the peppers and bake when ready, or assemble and bake from cold — add a few extra minutes if straight from the fridge.
- Can I double the recipe?
- Sure thing. Use two baking dishes or a larger roasting pan so peppers don’t steam. Baking time remains similar; you might need an extra 5–7 minutes if your pan gets crowded.
- Can I substitute butter with oil?
- Technically yes, but you’ll miss that buttery magic. Use ¾ the amount of oil compared to butter and opt for olive oil to keep flavor bright.
- How do I know it’s done?
- You’ll see bubbling cheese, slightly charred edges on the peppers, and you’ll register a savory aroma. For certainty, the filling’s internal temperature should hit 165°F.
- What if I don’t have ingredient X?
- No panic. No onion? Use 1 tsp onion powder. No breadcrumbs? Use crushed crackers or cooked rice. No bell peppers? Try zucchini boats or halved sweet potatoes as a cozy base.
How I Like to Serve It
I love these peppers with a crisp green salad and a cold glass of white wine for a weeknight dinner. For family meals, pair with steamed rice or buttery mashed potatoes to soak up the juices. Bring them to potlucks — they reheat beautifully and make great leftovers for a lunchbox. In summer, serve alongside grilled corn; in winter, pile on comfort sides and call it a cozy meal.
Notes
- Store leftovers in an airtight container in the fridge for up to 3 days. Reheat in a 350°F oven for 10–12 minutes or microwave until warm.
- Safe cooking temp for chicken: 165°F. Use an instant-read thermometer for peace of mind.
Final Thoughts
Closing: Now go impress someone — or just yourself — with these bubbly, savory stuffed peppers. They look like effort, taste like comfort, and truly reward a little time in the kitchen.