
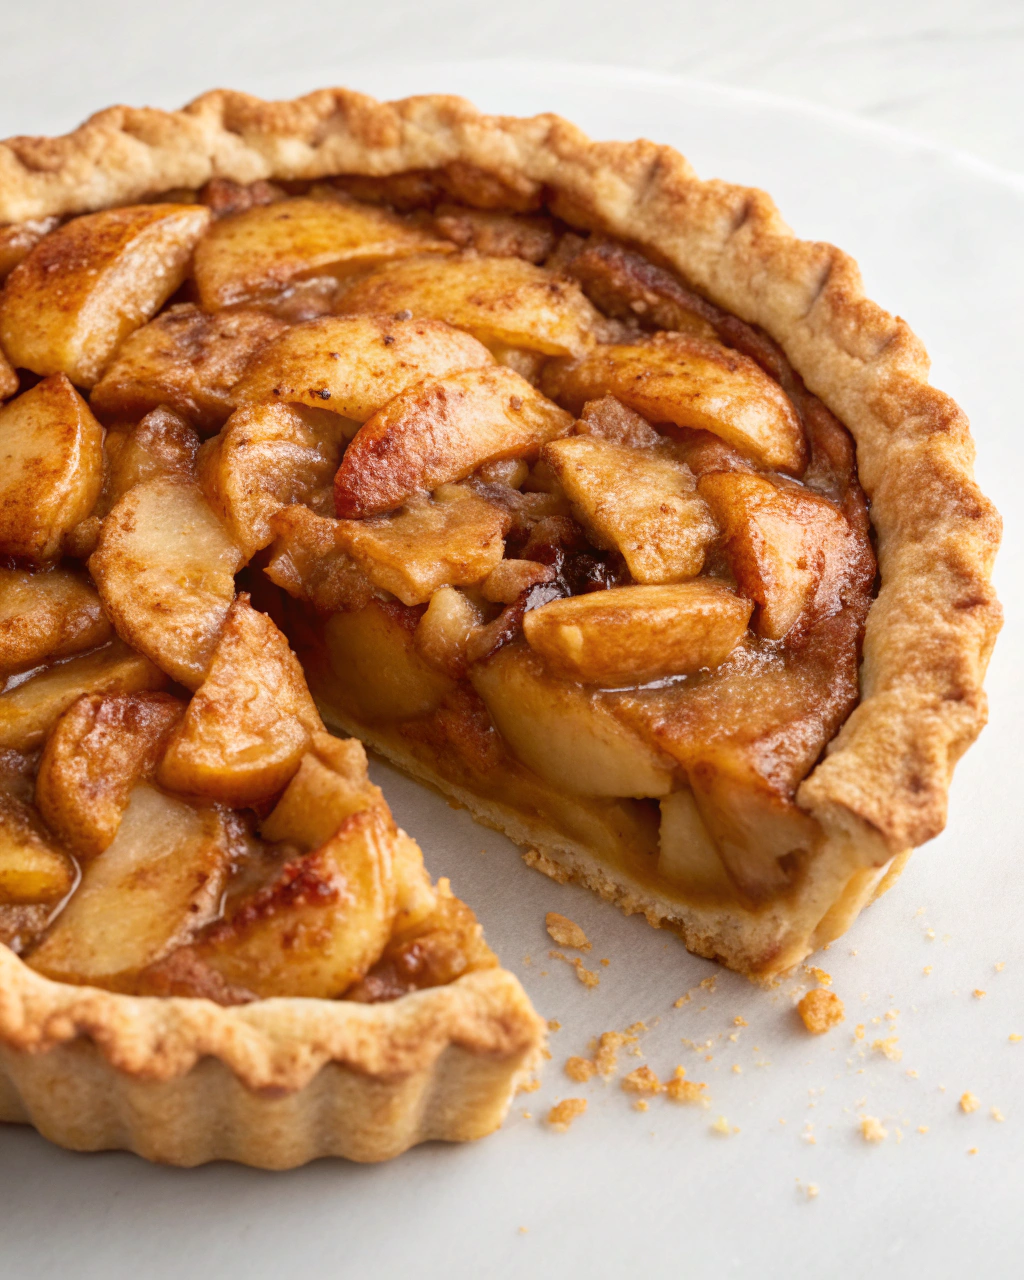
Nothing says fall quite like the sweet, sticky goodness of a baked caramel apple pie fresh out of the oven. This isn’t just any pie — it’s got that golden, flaky crust that shatters with a satisfying crunch and a bubbling, caramel-drizzled apple filling that smells like a hug wrapped in cinnamon and brown sugar. I remember sneaking into the kitchen as a kid, drawn by that irresistible aroma, waiting impatiently for it to cool just enough so I could steal a slice. This pie is cozy, comforting, and honestly, a little addictive once you get a taste of its buttery crust and gooey, spiced apples. Ready to make your kitchen smell like a bakery and your taste buds sing? Let’s dive into creating this homemade caramel apple dream!
Quick Facts
- Yield: Serves 8
- Prep Time: 30 minutes
- Cook Time: 50 minutes
- Total Time: 1 hour 20 minutes
Why This Recipe is Awesome
This Baked Caramel Apple Pie is the ultimate comfort dessert — it’s sweet, buttery, and loaded with tender cinnamon-spiced apples wrapped in a golden, flaky crust that’s basically a little piece of heaven. The caramel drizzle adds a luscious, gooey touch that makes each bite irresistible. Plus, it’s surprisingly simple to put together, even if you’re not a pastry wizard (trust me, I’m not either). Your oven will handle the magic while you get to enjoy that incredible smell filling your home. It’s so easy even your cat might curl up nearby, waiting for a crumb to fall.
Ingredients
For the Main Dish:
- 2 ½ cups all-purpose flour
- 1 tsp salt
- 1 tsp sugar
- 1 cup (2 sticks) unsalted butter, cold and cubed
- 6–8 tbsp ice water
- 6 cups peeled and sliced Granny Smith apples (about 6 medium apples)
- ¾ cup granulated sugar
- ¼ cup brown sugar, packed
- 1 tsp cinnamon
- ¼ tsp nutmeg
- 2 tbsp all-purpose flour (to thicken filling)
- 1 tbsp lemon juice
- 1 tsp vanilla extract
- 1 egg, beaten (for egg wash)
For the Caramel Sauce:
- ½ cup brown sugar, packed
- ¼ cup unsalted butter
- ¼ cup heavy cream
- Pinch of salt
- 1 tsp vanilla extract
How I Make It
Step 1:
First, I start with the crust because a flaky, buttery crust makes all the difference. Combine the flour, salt, and sugar in a big bowl. Toss in the cold, cubed butter and use a pastry cutter or your fingers to break it down until the mixture looks like coarse crumbs with pea-sized bits. The secret here? Keep everything cold—it’s what makes that dreamy flakiness. Drizzle in the ice water slowly, stirring until the dough just comes together. Don’t overwork it; the less you fuss, the lighter your crust. Form the dough into two discs, wrap in plastic, and chill at least 30 minutes — so the butter firms back up before baking.
Step 2:
While the dough chills, peel, core, and slice your apples. Mix them with the sugars, cinnamon, nutmeg, flour, lemon juice, and vanilla extract. The lemon juice keeps the apples bright and adds a little zing. Toss until every slice is nicely coated — this filling will bubble and thicken beautifully as it bakes. A quick tip: use a box grater to zest in a little fresh lemon or orange peel for a citrus twist, if you want to get fancy.
Step 3:
Preheat your oven to a toasty 400°F. Roll out one disc of dough on a lightly floured surface until about 12 inches wide, then carefully transfer it to a 9-inch pie plate. Pile the apple filling inside, mounding it up high because it’ll shrink and settle as it cooks. Next, roll out your second dough disc to cover. You can cut slits for steam vents or get creative with a lattice top — both work wonderfully. Trim extra dough and crimp the edges for that classic pie look. Brush the crust generously with the beaten egg wash so it bakes up golden and glossy.
Step 4:
Bake the pie at 400°F for 20 minutes, then reduce the heat to 350°F and bake for another 30–35 minutes, until the crust is golden and the filling is bubbly and fragrant. You’ll hear that delightful gentle hiss of apples cooking in caramel as the pie does its thing. If the edges brown too fast, cover them loosely with foil after the first 20 minutes — no one likes burnt crust!
Step 5:
While the pie cools (at least 2 hours – this part is crucial for the filling to set), make the caramel sauce. In a small saucepan, melt butter and brown sugar over medium heat, stirring until smooth. Slowly whisk in heavy cream, salt, and vanilla extract. Let it simmer until thickened slightly, about 3 minutes. Drizzle the warm caramel over each slice just before serving. That glossy, buttery sweet finish? Absolutely irresistible.
Pro Tips
- Make sure your butter is ice cold for the crust — this is the secret to flakiness.
- Use a mix of tart (Granny Smith) and sweet apples for depth of flavor and balanced sweetness.
- Don’t skip the lemon juice on the apples — it keeps them from browning and brightens the pie.
- If your crust edges brown too quickly, cover with foil halfway through baking to prevent burning.
Common Mistakes to Avoid
- Skipping preheating: Classic rookie move. It changes texture and bake time.
- Overmixing: Leads to dense or chewy results. Mix until just combined.
- Guessing cook time: Always use visual cues or a timer, not just vibes.
- Overcrowding pans: Give your food some breathing room to crisp properly.
Alternatives & Substitutions
- You can substitute all-purpose flour with gluten-free blends; just look for 1:1 baking flour for best results.
- Butter can be swapped with coconut oil for a dairy-free option, but the flavor and texture will be a touch different — still delicious!
- If you don’t have heavy cream for caramel, use full-fat coconut milk or half-and-half, but watch the thickness.
- Apples: Feel free to experiment with Honeycrisp or Fuji for sweeter pies.
Variations & Tips
- Add a pinch of ground ginger or cloves for a warm, spiced twist.
- Top your pie with a sprinkle of coarse sugar before baking for that extra crunchy crust.
- Swirl in some cream cheese or mascarpone with the filling for decadence.
- Make mini pies or hand pies for easy portion control and adorable presentation.
- Add a handful of chopped pecans or walnuts inside the filling for crunch.
- Use a lattice crust and sprinkle with cinnamon sugar for a classic look that wows.
FAQ (Frequently Asked Questions)
- Can I make this ahead of time?
- Yes! Assemble and chill the pie (covered with plastic wrap) for up to 24 hours. Bake it straight from the fridge, just add a few extra minutes to cooking time. Leftovers reheat nicely in a low oven (around 300°F) to keep crust crisp.
- Can I double the recipe?
- Sure thing. Use two pie pans or a larger deep-dish pan. Baking time might increase slightly — watch for a golden crust and bubbly filling as your doneness guide.
- Can I substitute butter with oil?
- Technically yes, but you’ll miss that buttery magic. Use ¾ the amount of oil. Note: crust won’t be as flaky, more tender than crisp.
- How do I know it’s done?
- The crust should be golden brown with slightly darker edges, and you’ll see bubbling filling through the vents or lattice. The aroma should be bold and inviting!
- What if I don’t have ingredient X?
- For example, no lemon juice? Substitute with a splash of white vinegar or a few drops of apple cider vinegar. No cinnamon? Pumpkin pie spice works in a pinch.
How I Like to Serve It
I love serving this pie warm with a scoop of vanilla ice cream or a dollop of whipped cream — absolute bliss. It’s perfect for cozy weekend breakfasts, holiday dinners, or even as a sweet treat after a casual weeknight meal. Pair it with a hot cup of coffee or apple cider to amp up the fall vibes. Bonus: leftover pie makes an excellent midday snack (if it ever lasts that long!).
Notes
- Store leftover pie covered loosely at room temperature for up to 2 days or in the fridge up to 4 days.
- Reheat gently in the oven (300°F for 10–15 minutes) to revive that crispy crust.
Final Thoughts
Closing: Now go impress someone — or just yourself — with your homemade masterpiece! There’s nothing quite like biting into that crispy, caramel-drizzled crust and melting, spiced apple filling. Happy baking, my friend!