
Alright, let me tell you about the magical moment when these chocolate muffins first came into my life. Picture this: a chaotic weeknight, kids clamoring for a quick treat, and me rummaging through the pantry hoping for a miracle. Enter these irresistibly fudgy, fluffy chocolate muffins, smelling like a cozy hug from the oven. From that night on, they became my secret weapon — quick enough to whip up on a busy evening but special enough to feel like a little celebration. Trust me, once you try this recipe, your kitchen will be filled with the rich aroma of cocoa and warm vanilla, and you’ll have a batch of muffins disappearing faster than you can say, “Who wants more?”
Quick Facts
- Yield: Makes 12 muffins
- Prep Time: 15 minutes
- Cook Time: 20 minutes
- Total Time: 35 minutes
Why This Recipe is Awesome
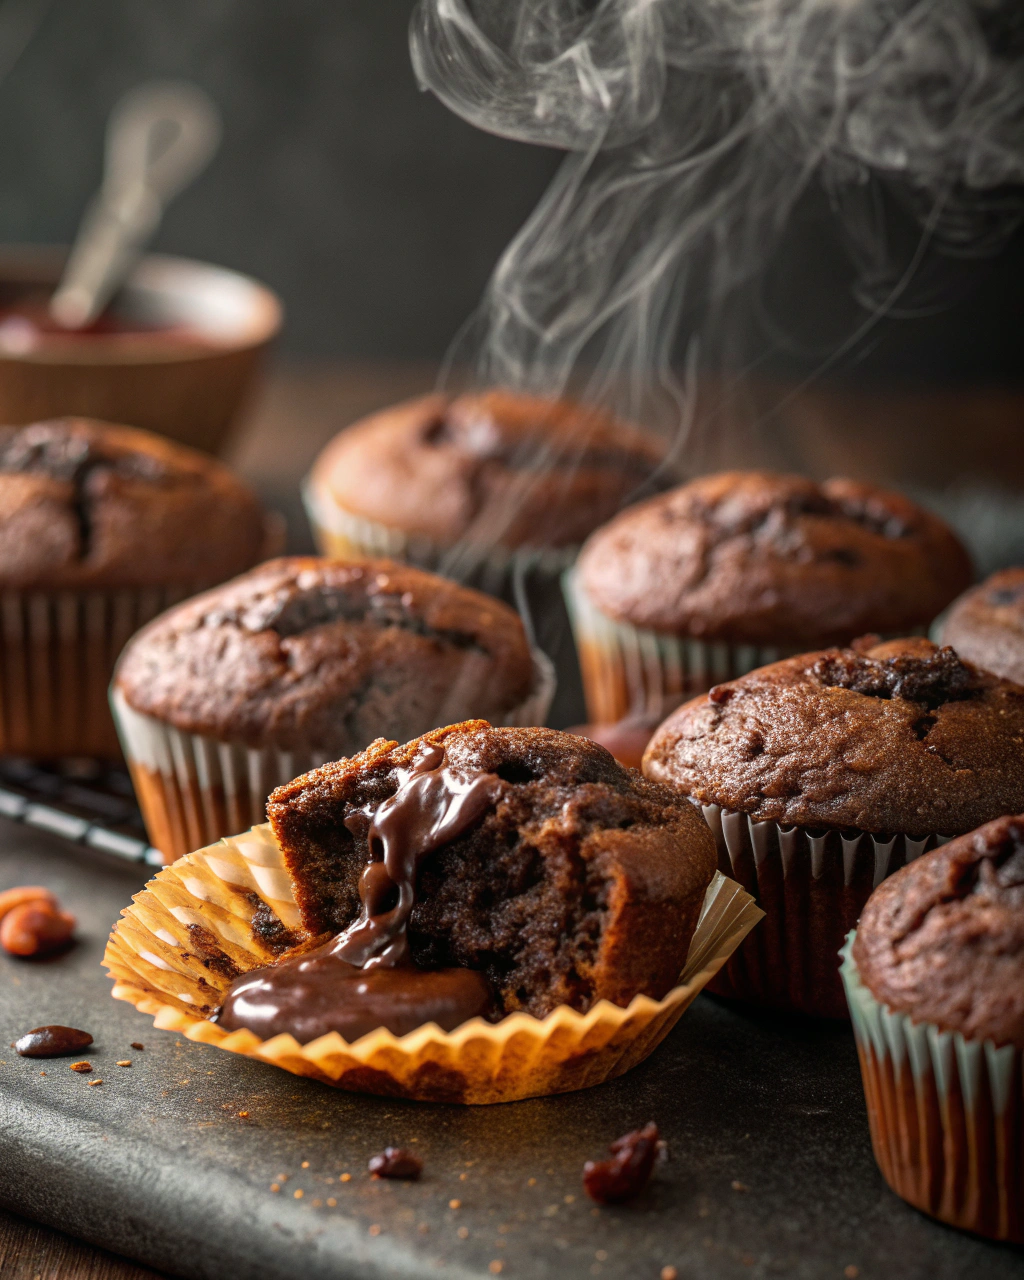
These chocolate muffins are the perfect little hugs in cupcake form — cakey, moist, and packed with rich chocolate flavor that’s just the right amount of sweet without being a sugar bomb. Plus, the crumb is soft but sturdy, with melty pockets of chocolate chips that give you that satisfying ooey-gooey surprise. It’s so easy even your oven can’t mess it up. Honestly, these muffins make busy weeknights feel way less hectic (and way more delicious).
Ingredients
For the Main Dish:
- 1 ¾ cups all-purpose flour
- ½ cup unsweetened cocoa powder (Dutch-process if you have it, but regular works great!)
- 1 cup granulated sugar
- 1 tsp baking powder
- ½ tsp baking soda
- ¼ tsp salt
- 1 cup buttermilk (or 1 cup milk + 1 tbsp lemon juice, let sit 5 minutes)
- ½ cup unsalted butter, melted and cooled
- 2 large eggs
- 2 tsp vanilla extract
- 1 cup semi-sweet chocolate chips
How I Make It
Step 1:
First things first, preheat your oven to 375°F and line a 12-cup muffin tin with paper liners or grease it well with butter. In a large bowl, whisk together your flour, cocoa powder, sugar, baking powder, baking soda, and salt. I like to give it a good stir so everything’s evenly mixed — no one wants a salty surprise!
Step 2:
In another bowl, combine the buttermilk, melted butter, eggs, and vanilla extract. Whisk gently until the mixture looks smooth and shiny. The melted butter adds a lovely richness here, so don’t skip it — but make sure it’s not hot or you’ll scramble your eggs.
Step 3:
Now, here’s where you want to be gentle: pour the wet ingredients into the dry, and fold them together with a spatula just until combined. You’ll see the batter is thick and fudgy with a dark chocolate hue — perfection. Overmixing will toughen your muffins, so stop as soon as there are no dry streaks. Fold in those chocolate chips last for gooey pockets of happiness.
Step 4:
Divide the batter evenly among the muffin cups — I use an ice cream scoop for neat, equal muffins. Slide them into the hot oven and bake for about 18-20 minutes. You want to look for set tops with a slight puff and a toothpick clean or with a few moist crumbs. When they’re done, your kitchen will smell like cocoa heaven, and the tops should be tender with a little give.
Step 5:
Pop the muffins out of the tin and onto a wire rack to cool for at least 10 minutes — this helps them finish cooking inside and keeps them fluffy. Serve warm or at room temperature. Don’t forget to sneak one straight from the rack; it’s the best test, trust me!
Pro Tips
- Use room temperature eggs: They blend more evenly and help create a smooth batter.
- Melt your butter slowly: Overheating can cook the eggs when mixing, so let melted butter cool to lukewarm before adding.
- Don’t skip the buttermilk: Its acidity tenderizes the crumb and balances the cocoa’s bitterness.
- Add a pinch of instant espresso powder: It amps up the chocolate flavor without a coffee taste — total game changer!
Common Mistakes to Avoid
- Skipping preheating: Classic rookie move. It changes texture and bake time.
- Overmixing: Leads to dense or chewy results. Mix until just combined.
- Guessing cook time: Always use visual cues or a timer, not just vibes.
- Overcrowding pans: Give your food some breathing room to crisp properly.
Alternatives & Substitutions
- You can swap all-purpose flour for gluten-free 1:1 baking flour, but expect a slightly different crumb texture.
- Use coconut oil instead of butter for a dairy-free version, though it may add a subtle coconut taste.
- If you don’t have buttermilk, plain Greek yogurt thinned with a splash of milk works beautifully.
Variations & Tips
- Stir in chopped nuts like walnuts or pecans for a crunchy contrast.
- Swap half the chocolate chips for white chocolate or peanut butter chips for a fun twist.
- Add a pinch of cinnamon or chili powder for a little warmth and surprise kick.
- Make mini muffins for kid-friendly, bite-sized treats perfect for lunchboxes.
- Top with a sprinkle of coarse sugar before baking for shiny, crackly tops.
- For extra indulgence, drizzle warm melted chocolate or a simple vanilla glaze after baking.
FAQ (Frequently Asked Questions)
- Can I make this ahead of time?
- Absolutely! Store cooled muffins in an airtight container at room temperature for up to 2 days. For longer storage, freeze them wrapped tightly for up to 3 months. Reheat in the microwave for 20 seconds, and they’ll taste freshly baked.
- Can I double the recipe?
- Sure thing! Use two muffin tins or bake in batches. Just keep an eye on the baking time — it might need an extra minute or two if the pans are crowded.
- Can I substitute butter with oil?
- Technically yes, but you’ll miss that buttery magic. Use ¾ the amount of a neutral oil like canola or vegetable oil; your muffins will be moist but less rich.
- How do I know it’s done?
- Look for tops that are set but still tender, with a toothpick coming out clean or with a few moist crumbs. Edges may slightly pull away from the pan.
- What if I don’t have ingredient X?
- No worries! For example, if you don’t have cocoa powder, you can use an equal part melted chocolate (add less butter if needed). For baking soda, double the baking powder, but the rise may be less dramatic.
How I Like to Serve It
These muffins pair beautifully with a simple glass of cold milk, coffee, or a rich hot chocolate if you want to go all out. I like to serve them warm for breakfast or an after-dinner treat, especially during hectic weeknights when the kids need a little pick-me-up. On cozy weekends, toss some fresh berries or a dollop of whipped cream on the side to turn them into a dessert star!
Notes
- Store any leftovers in an airtight container to keep them moist and fresh.
- If freezing, wrap each muffin tightly before placing them in a freezer bag.
Final Thoughts
Closing: Now go impress someone — or just yourself — with your homemade masterpiece! Nothing beats that first warm bite bursting with chocolate goodness, especially after a long day.