
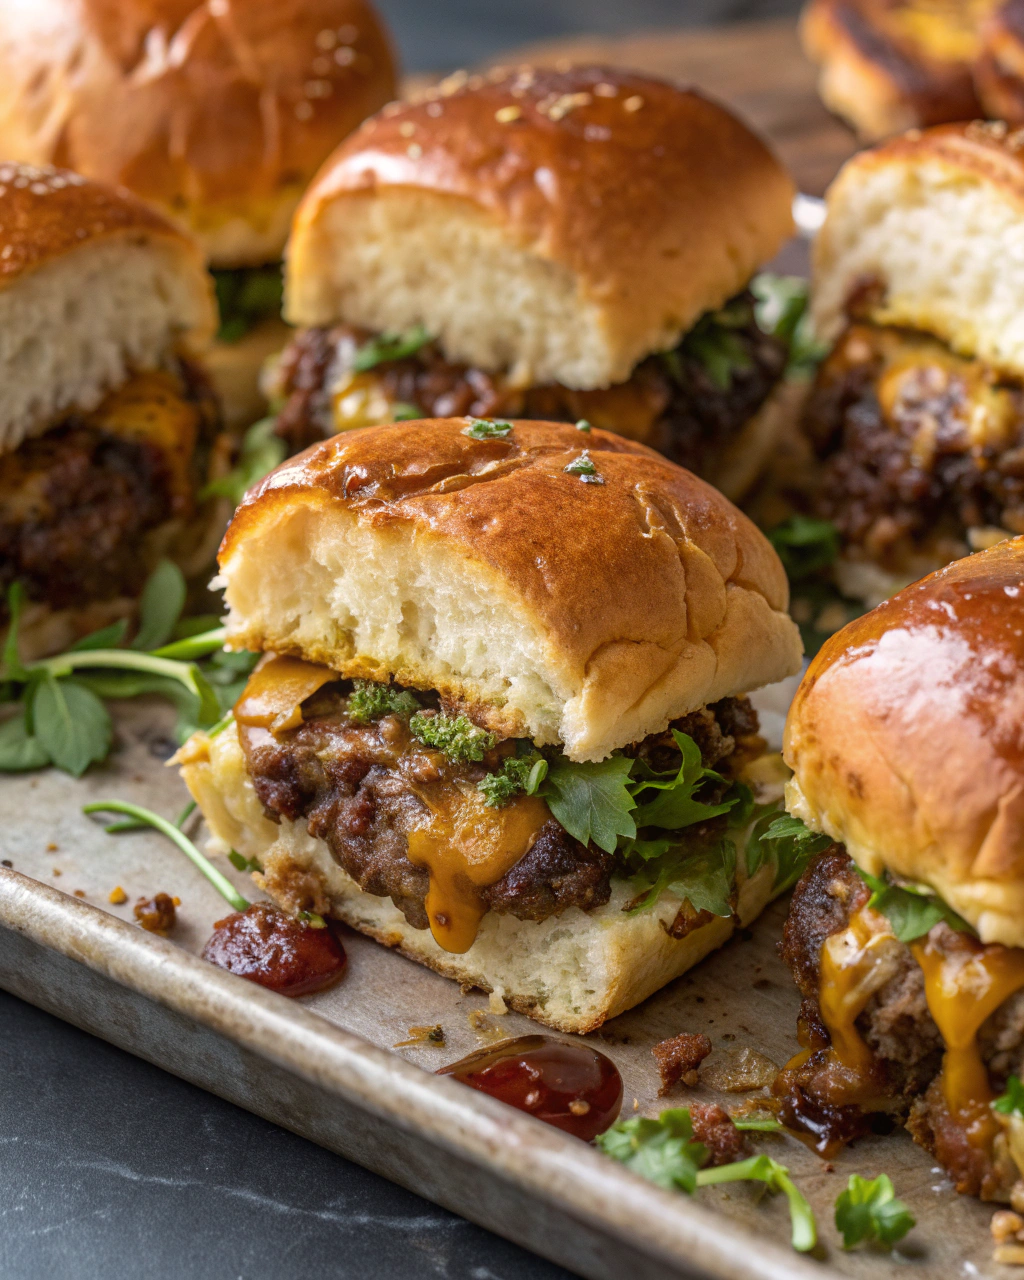
Okay, so imagine this: it’s a chilly evening, the sky outside is that perfect shade of twilight gray, and the smell of something sweet and savory wafts through your kitchen. That’s exactly what happens when I make these Sweet and Sticky Cheeseburger Sliders. These little guys are like a hug on a plate—juicy, cheesy, with just the right touch of a sticky glaze that makes every bite pop in your mouth. Honestly, if you love the classic cheeseburger but want to jazz it up with something cozy and fun, these sliders are your new best friend. Plus, they come together quicker than you can say “slider,” and promise to be the star of your weekend dinner or casual night in.
Quick Facts
- Yield: Serves 6 (makes 12 sliders)
- Prep Time: 15 minutes
- Cook Time: 15 minutes
- Total Time: 30 minutes
Why This Recipe is Awesome
This recipe takes your everyday cheeseburger and turns it up a notch with a sticky, slightly sweet glaze that caramelizes beautifully in the oven. The buns get golden and toasted, the cheese melts perfectly over juicy beef patties, and the whole dish sings with flavor and texture. It’s the kind of slider that makes you want to grab one after another—crispy edges, melty cheese, and that little hint of sweetness you didn’t know you needed. Plus, it’s all made with simple, pantry-friendly ingredients. Trust me: it’s so good, even picky eaters will be sneaking seconds (or thirds!).
Ingredients
For the Main Dish:
- 1 lb ground beef (80/20 for juiciness)
- 12 slider buns
- 6 slices cheddar cheese (cut in halves)
- 1 small onion, finely chopped
- 1 tsp garlic powder
- 1 tsp smoked paprika
- Salt and pepper to taste
- 2 tbsp unsalted butter, melted
For the Sweet & Sticky Glaze:
- 1/4 cup ketchup
- 2 tbsp brown sugar
- 1 tbsp Worcestershire sauce
- 1 tsp Dijon mustard
- Optional: dash of hot sauce for a kick
How I Make It
Step 1:
Let’s start by preheating your oven to a toasty 350°F—this helps everything bake evenly and the buns get their perfect golden hue. While that’s warming up, toss the ground beef into a bowl with chopped onions, garlic powder, smoked paprika, salt, and pepper. Mix gently just to combine—don’t go overboard or your patties will end up tough.
Step 2:
Now, pinch off about 1.5 tablespoons of beef for each tiny patty. Shape them gently into small rounds just slightly smaller than your buns because they’ll puff up as they cook. I like to line a baking sheet with parchment paper for easy cleanup, and arrange the patties side-by-side, leaving a bit of breathing room.
Step 3:
Pop the patties into the oven for about 10 minutes. Around the halfway mark, spoon a little of that sweet and sticky glaze over each patty, then lay half a slice of cheddar on top so it starts melting and gets all gooey and irresistible. The smell of caramelizing brown sugar and melted cheese will start to fill your kitchen—yum!
Step 4:
While the patties finish, butter the inside of your slider buns lightly with melted butter—it’ll give them a lovely golden crispiness when warmed. When your patties look juicy with golden edges and the cheese is perfectly melted, pull them out of the oven. Then place the buns inside the oven for about 3-4 minutes just to toast those buttery insides. Keep an eye on them—they go from golden to burnt faster than you might think!
Step 5:
Time to assemble! Slather a bit more of that sticky glaze on the bottom bun, nestle your cheesy patty on top, then crown with the top bun. Serve these warm with extra napkins because these sliders are delightfully messy in the best way possible.
Pro Tips
- Use 80/20 ground beef for that perfect balance of fat and flavor—leaner meat can dry out quickly.
- Don’t skip the butter on the buns—it’s a game changer for that golden toast and rich flavor.
- Brush the glaze on the patties halfway through baking to prevent it from burning but still get a sticky caramelized finish.
- Make sure to rest the sliders a minute after baking. It lets the juices redistribute so you don’t lose all that yummy flavor when you bite in.
Common Mistakes to Avoid
- Skipping preheating: Classic rookie move. It changes texture and bake time.
- Overmixing: Leads to dense or chewy results. Mix until just combined.
- Guessing cook time: Always use visual cues or a timer, not just vibes.
- Overcrowding pans: Give your food some breathing room to crisp properly.
Alternatives & Substitutions
- Swap ground beef with ground turkey or chicken for a lighter option—just watch the cook time as lean meats cook faster and can dry out.
- If you need dairy-free, use your favorite vegan cheese slice or skip the cheese and add avocado slices for creaminess.
- For gluten-free buns, look for small gluten-free rolls or make lettuce wraps for a fresh twist.
Variations & Tips
- Spicy kick? Add a pinch of cayenne pepper into the meat mix and use chipotle mayo on the buns.
- Make it kid-friendly by swapping smoked paprika for sweet paprika and keeping the glaze mild.
- Vegetarian option: swap beef for seasoned black bean patties — same glaze, big flavor!
- Add pickles or crispy fried onions for extra crunch.
- Creative twist: top with a fried egg for a breakfast slider vibe.
FAQ (Frequently Asked Questions)
- Can I make this ahead of time?
- Absolutely! Prepare and cook patties up to the glazing step, then refrigerate. When ready, add glaze and cheese, then bake just before serving for freshest taste.
- Can I double the recipe?
- Yes! Use a larger baking sheet or two pans to avoid overcrowding. Keep an eye on bake time as it might vary slightly with more patties.
- Can I substitute butter with oil?
- Technically yes, but you’ll miss that buttery magic. Use ¾ the amount of oil and expect a slightly less crispy bun.
- How do I know it’s done?
- The patties should have golden-brown edges, cheese melted and bubbly, and the glaze sticky but not burnt.
- What if I don’t have ingredient X?
- No ketchup? Tomato paste mixed with a little honey works. No Worcestershire? Soy sauce or a splash of balsamic vinegar helps bring the umami.
How I Like to Serve It
I love pairing these sliders with a simple side of sweet potato fries or a crunchy coleslaw to balance the sweetness. On weekends, a cold craft beer or a soda with plenty of ice hits the spot perfectly. Bonus points if you gather friends or family around the table—these sliders were made for sharing those cozy, casual nights in!
Notes
- Store any leftovers in an airtight container in the fridge for up to 2 days. Reheat gently in the oven for best texture.
- Ground beef should be cooked to an internal temp of 160°F for safety. Use a meat thermometer if you’re unsure!
Final Thoughts
Closing: Now go impress someone — or just yourself — with your homemade masterpiece! These sliders are the perfect blend of sweet, savory, and downright irresistible. Enjoy every sticky, cheesy bite!