
Alright, imagine biting into this sandwich: the first crunch of a perfectly crispy, golden chicken patty breaking through a pillow-soft, fluffy bun. The smell? Oh, it’s like a warm hug of herbs, spices, and buttery toasty bread all rolled into one. I’m telling you, if comfort food had a poster child, this Fluffy Chicken Sandwich would be strutting its stuff front and center. Whether you’re feeding picky kiddos, impressing tough dinner guests, or just craving a seriously satisfying lunch, this recipe has got you covered. And here’s the kicker: it’s surprisingly easy to nail, even if you’re not exactly a kitchen ninja yet. So, roll up those sleeves and let’s get ready to make the fluffiest chicken sandwich that everyone will rave about (especially you)!
Quick Facts
- Yield: Serves 4
- Prep Time: 15 minutes
- Cook Time: 20 minutes
- Total Time: 35 minutes
Why This Recipe is Awesome
This fluffy chicken sandwich isn’t just your run-of-the-mill lunch. Oh no, it’s got that magical combo of crispy, juicy, and tender all wrapped in a soft-as-a-cloud homemade bun or your favorite store-bought bun. The savory spiced chicken wakes up your taste buds, while the fluffiness balances everything with a buttery, melt-in-your-mouth vibe. It’s so easy even your oven can’t mess it up, yet impressive enough that folks will ask for seconds – or the recipe. Basically, it’s like the superstar of sandwiches, and your taste buds will throw a party with every bite.
Ingredients
For the Main Dish:
- 1 lb boneless, skinless chicken breasts (about 2 large breasts)
- 1 cup buttermilk
- 1½ cups all-purpose flour
- 1 tsp paprika
- 1 tsp garlic powder
- 1 tsp onion powder
- 1 tsp salt
- ½ tsp black pepper
- ½ tsp cayenne pepper (optional, for a kick)
- Vegetable oil, for frying (about 2 cups)
- 4 soft sandwich buns (brioche or potato buns work great)
- 2 tbsp melted butter (for toasting buns)
For the Sauce / Garnish:
- ½ cup mayonnaise
- 1 tbsp Dijon mustard
- 1 tsp honey
- Leafy lettuce (like butter or romaine)
- Thin slices of tomato
- Pickles (optional but highly recommended!)
How I Make It
Step 1:
Start by pounding the chicken breasts to an even thickness (about ½ inch thick). This helps them cook evenly and stay juicy. Then, soak the chicken in 1 cup buttermilk. I like to let it marinate for 30 minutes if you have time, but 15 minutes still does wonders for tenderizing and flavor. The kitchen will fill with that tangy, fresh scent—it’s like a promise of what’s to come.
Step 2:
While the chicken is soaking, whisk together the flour, paprika, garlic powder, onion powder, salt, black pepper, and cayenne (if you want some heat). This spice blend adds a punch without being overpowering. Set this ready-dusting station next to your fryer or skillet. Pro tip: Use a shallow dish and shake off excess flour before frying to avoid clumpy coating.
Step 3:
Heat your oil in a deep skillet or Dutch oven over medium-high heat until it hits about 350°F. You want enough oil to cover at least halfway up the chicken pieces. It should shimmer but not smoke—that’s your green light. Now, dredge each chicken breast in the flour mixture, pressing gently into the crust. Drop them carefully in the hot oil and listen for that satisfying sizzle. That sound? Pure kitchen magic.
Step 4:
Fry the chicken for about 5-6 minutes per side, or until the crust is a deep golden brown and the internal temperature reads 165°F on an instant-read thermometer. You’re looking for crispy edges that crunch but don’t burn and a juicy center that practically melts in your mouth. Don’t overcrowd the pan; cook in batches if needed to keep that crispiness perfect.
Step 5:
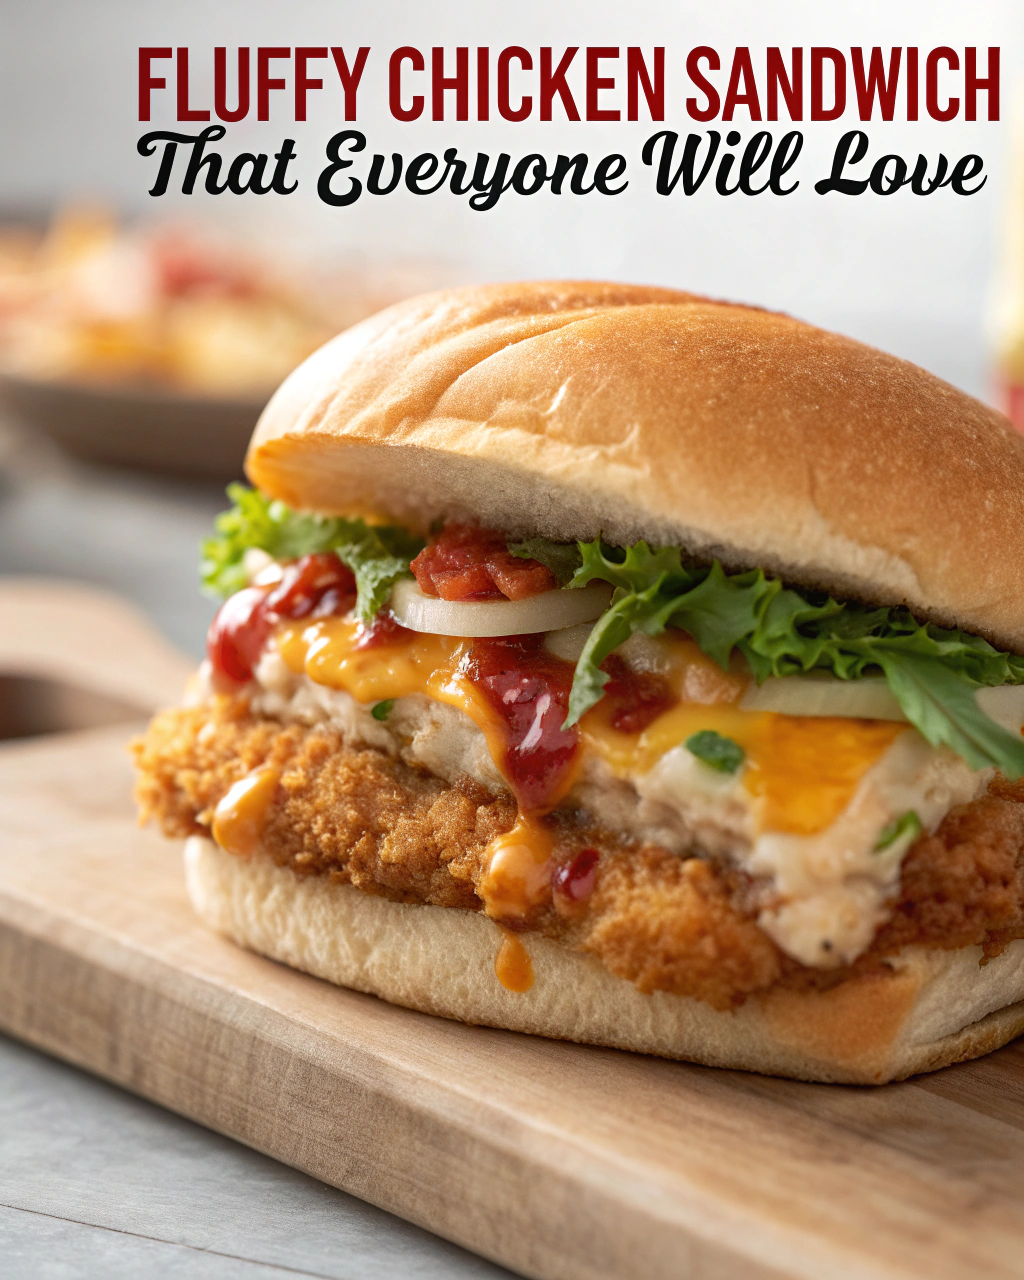
While the chicken cooks, lightly toast the buns by brushing the insides with melted butter and warming them in a pan or oven until golden and fragrant. Spread your quick sauce made from mayonnaise, Dijon mustard, and honey on the buns, layer on fresh leafy lettuce, those juicy tomato slices, and pickles if you’re using. Top with the crispy chicken, then crown with the bun top. Give it a gentle press and get ready for one of the most satisfying bites of your life.
Pro Tips
- Use buttermilk or add a splash of vinegar/lemon juice to milk if you don’t have buttermilk—this keeps your chicken tender and helps the flour coat stick better.
- Don’t skip pounding the chicken—it ensures even cooking and juicy bites every time.
- Maintain oil temperature between 350°F and 360°F. Too low, and the chicken absorbs oil; too high, and the crust burns before chicken cooks inside.
- Let chicken rest for 5 minutes after frying; it helps the juices redistribute and keeps it juicy.
Common Mistakes to Avoid
- Skipping preheating: Classic rookie move. It changes texture and bake time.
- Overmixing: Leads to dense or chewy results. Mix until just combined.
- Guessing cook time: Always use visual cues or a timer, not just vibes.
- Overcrowding pans: Give your food some breathing room to crisp properly.
Alternatives & Substitutions
- Swap chicken for firm tofu or portobello mushroom slices for a vegetarian option — keep in mind texture changes but still delicious!
- Use Greek yogurt mixed with lemon juice as a substitute for buttermilk for a tangy, creamy marinade.
- For gluten-free, swap all-purpose flour with a blend of rice flour and cornstarch for the crisp coating.
Variations & Tips
- Add a spoonful of hot sauce to the buttermilk marinade for a spicy kick.
- Top with melted cheese (cheddar or pepper jack) for extra gooeyness.
- Make it kid-friendly by skipping the cayenne and pickles, adding a little honey mustard sauce instead.
- Try sandwiching with coleslaw for crunch and tang.
- Switch up the bun – try ciabatta or crusty rolls for a more rustic feel.
- For an original twist, sprinkle crispy bacon bits right on the sauce before adding the chicken.
FAQ (Frequently Asked Questions)
- Can I make this ahead of time?
- Yes! You can marinate the chicken in buttermilk a few hours ahead and keep it covered in the fridge. Cook and assemble just before serving for the freshest sandwich. Leftover fried chicken keeps well in an airtight container for up to 2 days—reheat in a 375°F oven to crisp it back up.
- Can I double the recipe?
- Sure thing. Just make sure to fry in batches and keep the oil temperature steady. You might need a bigger pan or a second skillet.
- Can I substitute butter with oil?
- Technically yes, but you’ll miss that buttery magic on the buns. Use about ¾ the amount of oil if you go the oil route.
- How do I know it’s done?
- Look for a deeply golden, crispy crust and check with an instant-read thermometer—165°F inside means juicy, safe chicken every time.
- What if I don’t have ingredient X?
- No worries! If you lack paprika, try smoked paprika or chili powder. Missing buttermilk? Regular milk with a splash of lemon juice or vinegar works great.
How I Like to Serve It
This chicken sandwich shines as a quick weeknight dinner with crispy fries or even a fresh garden salad. It’s a star at backyard BBQs paired with a cold lemonade or beer. In the fall, swap the lettuce for sautéed kale or spinach to cozy up the sandwich vibe. Honestly, it’s the kind of meal that cheers up any day — a little indulgent, totally satisfying, and fairly quick to pull together. Perfect for busy nights or laid-back weekends.
Notes
- You can store leftover cooked chicken in the fridge for 2 days, but it’s best reheated in the oven to keep the crust crisp.
- Always cook chicken breasts to a safe internal temperature of 165°F.
Final Thoughts
Closing: Now go impress someone — or just yourself — with your homemade masterpiece! There’s nothing like that first crunch and juicy bite to make you feel like a kitchen rockstar.