
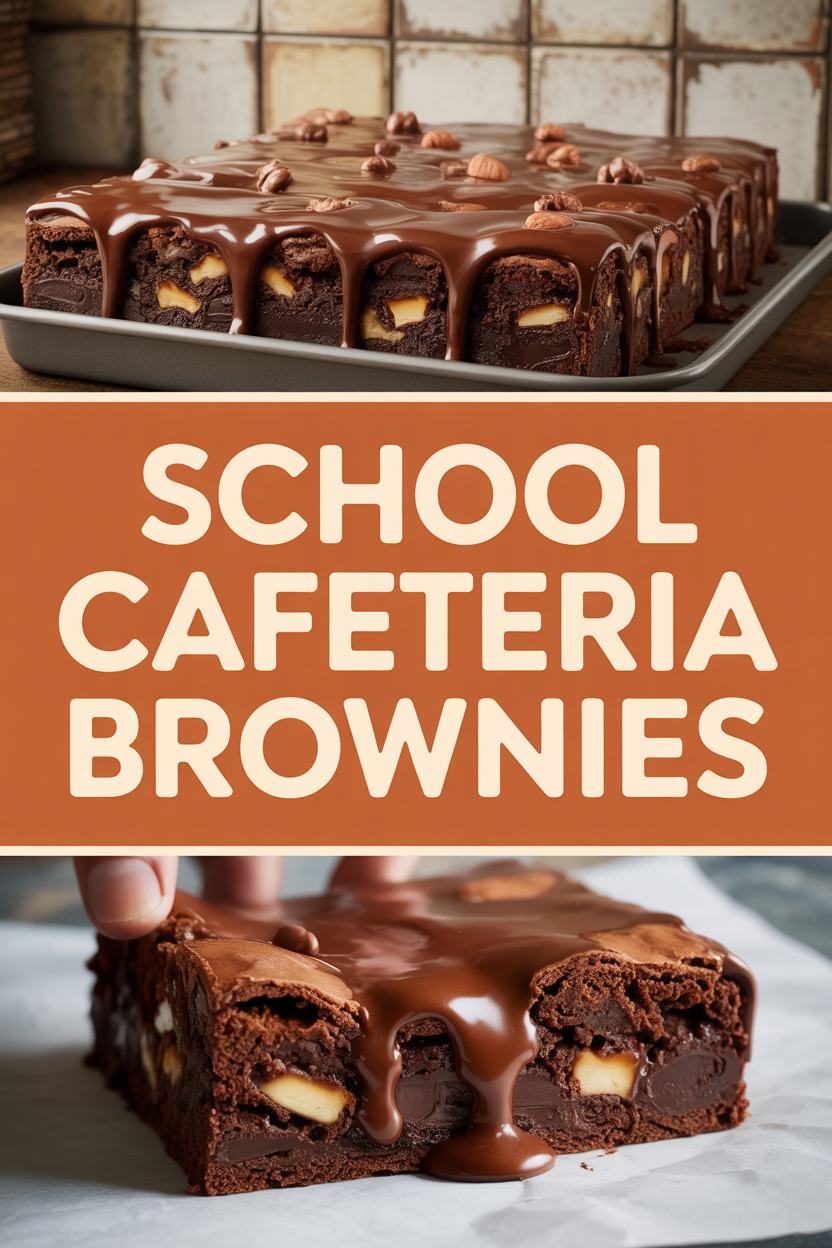
When I bite into these School Cafeteria Brownies, I travel straight back to that sticky tray-laden lunchroom where chocolate lived in big, chewy squares. My grandma used to tuck one into my school lunchbox—still warm from her oven—and I’d hover over the cardboard carton like it held treasure. The top cracked just right, the middle stayed fudgy, and the whole kitchen smelled like warm cocoa and butter. I recreated that exact combo in my kitchen: a simple batter, a glossy crackle top, and that unmistakable cafeteria vibe. These brownies taste like comfort, tiny rebellions against boring desserts, and the best kind of nostalgia you can bake.
Quick Facts
- Yield: Serves 12–16
- Prep Time: 15 minutes
- Cook Time: 25–30 minutes
- Total Time: 40–45 minutes
Why This Recipe is Awesome
These brownies hit that perfect school-cafeteria sweet spot: a shiny, crackly top, chewy edges, and a gooey, fudgy center. They bake fast, use simple pantry staples, and hold up well for classroom bake sales or lazy afternoons. Plus, they smell like cocoa and butter the whole time, which will make your neighbors knock on the door. It’s so easy even your oven can’t mess it up—unless you open the door every two minutes like I used to.
Ingredients
For the Main Dish:
- 1 cup (2 sticks) unsalted butter, melted and slightly cooled
- 2 cups granulated sugar
- 4 large eggs, at room temperature
- 2 tsp vanilla extract
- 1 cup all-purpose flour
- 3/4 cup unsweetened cocoa powder (natural or Dutch-process both work)
- 1/2 tsp baking powder
- 1/2 tsp fine sea salt
- 1 cup chocolate chips or chopped chocolate (semisweet or milk), optional but very recommended
For the Sauce / Garnish (if applicable):
- Optional: sprinkle flaky sea salt or powdered sugar after cooling
- Optional: warm caramel or chocolate sauce for drizzling when serving
How I Make It
Step 1:
Preheat the oven to 350°F and line a 9×13-inch pan with parchment, leaving a little overhang for easy lifting. In a large bowl, whisk together the melted butter and granulated sugar until glossy and smooth. That shiny swirl tells you you’re on the right track—think mirror-like, not grainy.
Step 2:
Add the eggs one at a time, whisking briskly after each addition, then stir in the vanilla. You’ll smell a rich, warm chocolate cookie vibe already. If you skip room-temperature eggs, the batter can seize a bit; if that happens, whisk in a tablespoon of warm water and carry on.
Step 3:
Sift together the flour, cocoa powder, baking powder, and salt. Fold the dry mix into the wet with a rubber spatula until just combined—stop when you no longer see streaks of flour. Fold in the chocolate chips if you’re using them. The batter should look dense and glossy. You’ll smell deep chocolate and butter—music to my ears.
Step 4:
Pour the batter into the prepared pan and smooth the top with a spatula. Bake for 25–30 minutes. Look for the telltale signs: a shiny, crackly top and slightly pulling away at the edges. Insert a toothpick into the center—if it comes out with a few moist crumbs (not wet batter), the brownies are done. If you like extra gooey centers, aim for the lower end of the time range; for firmer bars, add a couple more minutes.
Step 5:
Let the brownies cool in the pan on a rack for at least 15 minutes, then use the parchment overhang to lift them out. Sprinkle with flaky salt or dust with powdered sugar. Cut into squares with a sharp knife, wiping between cuts for clean edges. Serve warm with milk or a scoop of vanilla—nostalgia in every bite.
Pro Tips
- Use melted butter for that classic flavor and glossy top—don’t substitute all oil unless you accept a slightly different texture.
- Room-temperature eggs whisk into the batter easier and help create the crackly top; microwave cold eggs for 5–7 seconds if you forgot to take them out.
- If your cocoa powder looks dry, sift it with the flour to avoid lumps and ensure even mixing.
- For tidy squares, chill the brownies for 30 minutes before cutting; they firm up and slice like a dream.
Common Mistakes to Avoid
- Skipping preheating: Classic rookie move. It changes texture and bake time.
- Overmixing: Leads to dense or chewy results. Mix until just combined.
- Guessing cook time: Always use visual cues or a timer, not just vibes.
- Overcrowding pans: Give your food some breathing room to crisp properly.
Alternatives & Substitutions
- Swap butter for coconut oil (use ¾ the amount) for a dairy-free option—expect a slight coconut note and softer crumb.
- Use a 1:1 gluten-free flour blend to make them gluten-free; texture may change slightly and they might be a bit more crumbly.
- Replace 1 cup chocolate chips with chopped nuts for crunch (walnuts or pecans work great).
- For less sugar, cut the granulated sugar to 1 3/4 cups and add a tablespoon of honey or maple to keep moisture.
Variations & Tips
- Add a teaspoon of instant espresso powder to deepen the chocolate flavor without tasting like coffee.
- Swirl in 1/2 cup peanut butter or dulce de leche before baking for a fun twist.
- Mix in 1/2 cup crushed pretzels for a sweet-salty cafeteria style treat.
- Top with mini marshmallows in the last 2 minutes of baking for a rocky road vibe.
- Make them blondies by swapping cocoa for an extra 1/2 cup flour and 1 tsp cinnamon—same method, very different mood.
- Create a mint version by folding in 1/2 tsp peppermint extract and topping with chopped Andes mints.
FAQ (Frequently Asked Questions)
- Can I make this ahead of time?
- Yes! Bake, cool completely, then store airtight at room temperature for up to 3 days or in the fridge for up to a week. Reheat individual squares in the microwave for 10–12 seconds for that fresh-warm feeling.
- Can I double the recipe?
- Sure thing. Use a 13×18-inch sheet pan or two 9×13-inch pans. Keep the same temperature, but start checking for doneness a few minutes earlier since larger pans sometimes bake faster on top.
- Can I substitute butter with oil?
- Technically yes, but you’ll miss that buttery magic. Use ¾ the amount of oil. Expect a slightly different texture—more cake-like and less of that shiny, crackly top.
- How do I know it’s done?
- Look for a glossy, crackled top and edges that pull away from the pan. A toothpick should come out with moist crumbs—not wet batter. For fudgier brownies, take them out a touch early; for cakier, give them a few extra minutes.
- What if I don’t have ingredient X?
- Don’t panic. No cocoa? Use 1 1/4 cups extra flour and 1 tsp cinnamon for a blondie. No chocolate chips? Chop a chocolate bar or skip entirely—the brownies still shine.
How I Like to Serve It
I love these with a cold glass of milk for the ultimate cafeteria flashback. For grown-up dessert, serve warm with a scoop of vanilla ice cream and a drizzle of caramel. They make great potluck bites—cut into small squares so people can nibble. In fall, I pair them with hot apple cider; in summer, they travel perfectly to picnics.
Notes
- Store airtight at room temperature for up to 3 days or freeze individual squares wrapped tightly for up to 3 months; thaw at room temp.
- There’s no meat here, so no internal safe-temp needed—just aim for that texture cue with the toothpick.
Final Thoughts
Closing: Grab that mixing bowl, put on your favorite playlist, and bake yourself a pan of nostalgic joy—then go impress someone, or just share with yourself. You earned it.