
Okay, picture this: I dressed my oven in a witch’s hat and fed it brownies disguised as cupcakes. I promise they don’t bite. I make these every Halloween because they satisfy my deep, chocolatey urge and also because they look like I spent hours decorating when really I wore a spider ring and mashed frosting with the confidence of a candy-crazed toddler. The kitchen fills with warm cocoa and butter aromas that make neighbors suspiciously appear at the door. If you want gooey, fudgy centers, pillowy edges, and a playful orange-black buttercream that screams “party,” follow me — we’ll have spooky sweets ready before the broomstick leaves the driveway.
Quick Facts
- Yield: Serves 12
- Prep Time: 25 minutes
- Cook Time: 18 minutes
- Total Time: 60 minutes
Why This Recipe is Awesome
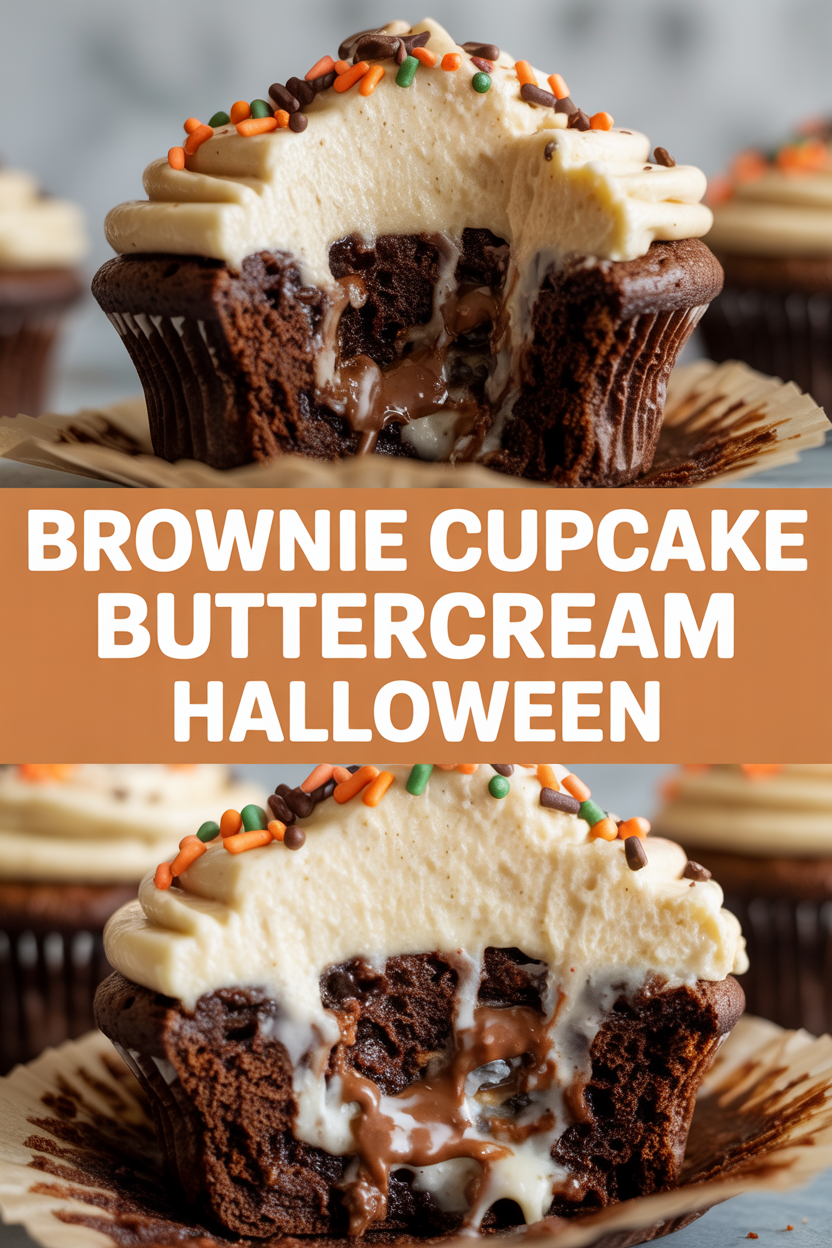
You get the fudgy, crackly top of a brownie with the individual-serve convenience of a cupcake and the fluffy, colorful charm of buttercream. It tastes rich and chocolatey with a tender crumb and a slightly gooey center for maximum indulgence. Plus, the buttercream pipes beautifully into swirls that look fancy even when you freestyle. It’s so easy even your oven can’t mess it up — and it fills the house with that warm cocoa-and-butter smell that makes everyone offer to clean up (don’t trust them, enjoy the praise).
Ingredients
For the Main Dish:
- 1/2 cup unsalted butter (1 stick), melted and slightly cooled
- 3/4 cup granulated sugar
- 2 large eggs, room temperature
- 1 tsp pure vanilla extract
- 1/3 cup unsweetened cocoa powder
- 1/2 cup all-purpose flour
- 1/4 tsp baking powder
- 1/8 tsp fine salt
- 1/3 cup mini chocolate chips (optional but recommended)
- Nonstick spray or cupcake liners
For the Buttercream & Garnish:
- 1/2 cup (1 stick) unsalted butter, room temperature
- 2 cups powdered sugar, sifted
- 1–2 tbsp whole milk or heavy cream
- 1 tsp vanilla extract
- Orange gel food coloring (a drop or two)
- Black gel food coloring or cocoa powder for brown tint
- Halloween sprinkles, candy eyes, mini Oreos, or chopped candy bars for decorating
How I Make It
Step 1:
Preheat the oven to 350°F. Line a 12-cup muffin tin with liners or spray well. In a medium bowl whisk together melted butter and granulated sugar until glossy. The mixture smells buttery and a little toasty — that’s the good stuff.
Step 2:
Add the eggs one at a time, whisking vigorously so the batter looks shiny and a little ribbon-like. Stir in the vanilla. In a separate bowl, mix the cocoa powder, flour, baking powder, and salt. Fold the dry mix into the wet just until combined — don’t overdo it or you’ll lose fudgy texture.
Step 3:
Fold in the mini chocolate chips if using. Spoon batter into the prepared cups, filling each about two-thirds full. The batter has a thick, shiny look and smells like chocolate heaven. Bake for about 18 minutes — watch for slightly crackled tops and a toothpick with a few moist crumbs, not wet batter.
Step 4:
Cool cupcakes in the tin for 8–10 minutes, then transfer to a rack to finish cooling. While they cool, beat the room-temp butter for the frosting until smooth. Gradually add the powdered sugar, then add milk and vanilla until you hit a spreadable consistency. Split the frosting into two bowls and tint one orange and one black (or deep chocolate) with gel colors.
Step 5:
Fit a piping bag with a star tip and add both colors side-by-side for a two-tone swirl, or pipe simple orange rosettes and drop on candy eyes to create little monsters. Garnish with sprinkles and mini Oreos for texture. Serve at room temperature so the buttercream stays creamy and the cupcakes keep their fudgy center.
Pro Tips
- Warm your eggs slightly by placing them in warm water for 5 minutes — they incorporate more easily and make a silkier batter.
- Use gel food coloring for vibrant orange without watering down the frosting.
- For super fudgy centers, pull the cupcakes at 16 minutes and check; every oven bakes differently.
- If your frosting feels too soft, chill it 10–15 minutes, then re-whip to firm up for piping.
Common Mistakes to Avoid
- Skipping preheating: Classic rookie move. It changes texture and bake time.
- Overmixing: Leads to dense or chewy results. Mix until just combined.
- Guessing cook time: Always use visual cues or a timer, not just vibes.
- Overcrowding pans: Give your food some breathing room to crisp properly.
Alternatives & Substitutions
- Swap all-purpose flour for a 1:1 gluten-free blend to make cupcakes gluten-free; expect slightly cake-y texture.
- Use coconut oil instead of butter for a dairy-free option (use ¾ the amount of butter called for and add a touch more vanilla).
- Replace mini chocolate chips with chopped nuts or dried cherries for texture and tang.
Variations & Tips
- Make pumpkin-spiced brownie cupcakes by adding 1 tsp pumpkin pie spice and swapping 2 tbsp flour for 2 tbsp pumpkin puree.
- Turn these into “graveyard” cupcakes: top with crushed Oreos and a cookie tombstone for spooky texture.
- Add cayenne (a pinch) to the batter for a Mexican-chocolate kick — adults will cheer.
- Create a kid-friendly version by using white buttercream dyed pastel colors and smiley-face candies.
- For a decadent twist, drop a square of chocolate in the center of each cup before baking for a molten core.
FAQ (Frequently Asked Questions)
- Can I make this ahead of time?
- Yes! Bake the cupcakes and cool completely, then store unfrosted in an airtight container for up to 2 days at room temp or freeze for up to 1 month. Thaw, then frost just before serving for best texture.
- Can I double the recipe?
- Sure thing. Use two muffin tins and rotate racks halfway through baking if your oven gets crowded. Watch the bake time — it may vary by a few minutes.
- Can I substitute butter with oil?
- Technically yes, but you’ll miss that buttery magic. Use ¾ the amount of oil and expect a slightly different crumb and flavor.
- How do I know it’s done?
- Look for slightly crackled tops and edges that pull away from the liner. A toothpick should come out with a few moist crumbs, not wet batter. That means fudgy, not raw.
- What if I don’t have ingredient X?
- Out of cocoa? Melt 2 oz dark chocolate and reduce butter by 1 tbsp to keep consistency. No mini chips? Chop a chocolate bar into small bits.
How I Like to Serve It
I serve these at Halloween parties with a big bowl of milk and coffee so flavors balance. They work great on a dessert table with other bite-sized treats, or wrapped individually for trick-or-treaters who deserve grown-up sweets. For a cozy night in, I pair them with a hot toddy or spiced coffee — the warmth plays nicely against the cool buttercream.
Notes
- Store frosted cupcakes in a single layer in an airtight container at room temp for up to 2 days, or chill up to 5 days (bring to room temp before serving).
- Reheat unfrosted cupcakes 10–12 seconds in the microwave for a warm center — don’t melt the frosting.
Final Thoughts
Closing: Go bake these, make a tiny mess, and laugh at how impressive they look — then eat three. You earned it.