
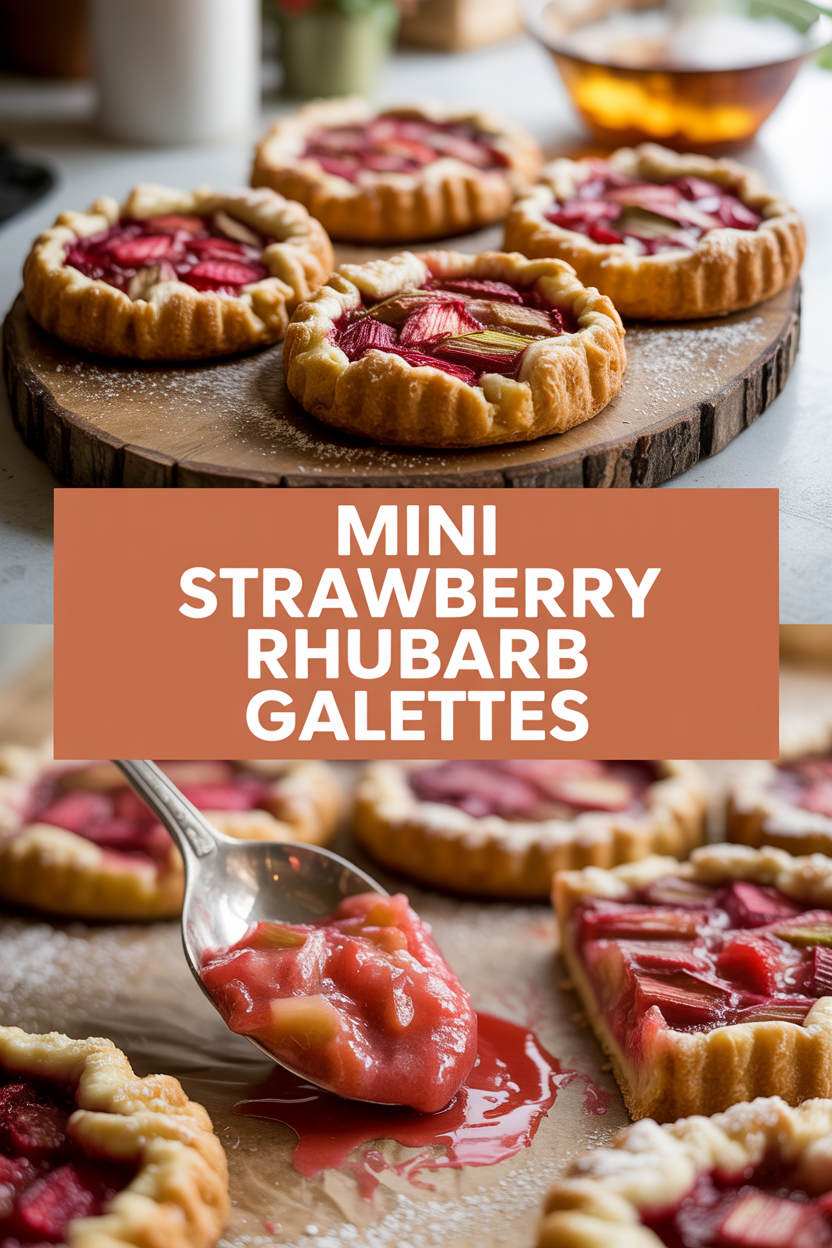
This recipe feels like wrapping a warm blanket around spring: I pull a bowl of glossy, ruby **strawberries** and bright-pink **rhubarb** to the center of the counter, and the kitchen fills with a sweet-tart perfume that makes me sigh. I love making these little hand pies when I want something cozy but not fussy — the dough snaps at the edge, the filling bubbles gently, and the house smells like a bakery for a glorious half hour. These mini galettes give you rustic, golden crust and a jammy center with just enough tartness to keep things interesting. They come together fast, and honestly, they’re the kind of dessert you can make for company and still look like a boss.
Quick Facts
- Yield: Serves 6
- Prep Time: 25 minutes
- Cook Time: 30 minutes
- Total Time: 55 minutes
Why This Recipe is Awesome
These mini galettes deliver all the charm of a rustic pie without the fuss of a full crust. The contrast between the flaky, buttery edge and the glossy, slightly syrupy strawberry-rhubarb filling makes every bite sing. They crisp up on the outside, ooze a little in the center, and pair perfectly with a scoop of vanilla ice cream. Plus, they’re forgiving: imperfect folds add character, not punishment. It’s so easy even your oven can’t mess it up.
Ingredients
For the Main Dish:
- 1 (17.3 oz) package refrigerated pie crusts (or 1 recipe homemade pie dough, chilled)
- 2 cups hulled and quartered strawberries (about 8 oz)
- 1 1/2 cups chopped rhubarb (about 6 oz)
- 1/2 cup granulated sugar
- 2 tbsp cornstarch
- 1 tbsp fresh lemon juice
- 1 tsp vanilla extract
- Pinch of fine sea salt
- 1 tbsp unsalted butter, cut into tiny pieces (optional, for richness)
- 1 large egg beaten with 1 tbsp water (for egg wash)
- 1 tbsp coarse sugar (for sprinkling)
For the Sauce / Garnish (if applicable):
- Vanilla ice cream or whipped cream, for serving (optional)
How I Make It
Step 1:
Preheat the oven to 375°F. Line a baking sheet with parchment paper so the bottoms stay pretty. In a bowl, toss the **strawberries** and **rhubarb** with 1/2 cup sugar, 2 tbsp cornstarch, 1 tbsp lemon juice, 1 tsp vanilla, and a pinch of salt. You’ll notice the fruit go shiny and slick — that’s the cornstarch starting to do its job. Let it sit while you roll out the dough so the flavors mingle.
Step 2:
Unroll the pie crusts and cut out six rounds about 5–6 inches across (I use a cereal bowl to guide me). If using homemade dough, chill it until firm so it holds shape. Arrange the rounds on the prepared sheet. Spoon about 1/3 cup of the filling into the center of each round, leaving a 1-inch border. Dot each mound with a little butter if you like extra richness.
Step 3:
Fold the edges up and over the filling in rustic pleats. Don’t worry about perfection — the cracks and folds brown beautifully and add personality. Brush each crust edge with the egg wash so they turn glossy and golden. Sprinkle the coarse sugar over the edges and the fruit for a crunchy, sparkling finish. You’ll hear a soft sizzle when these hit the oven and smell the fruit sweetening as they bake.
Step 4:
Bake at 375°F for about 28–32 minutes, until the edges turn a deep golden brown and the filling bubbles in the center. If the edges brown too quickly, tent them loosely with foil after 20 minutes. Watch for that juicy bubble — that tells you the cornstarch activated and the filling thickened.
Step 5:
Let the galettes cool on the pan for at least 10 minutes so the filling firms up a bit and won’t run everywhere when you pick one up. Serve slightly warm with a scoop of vanilla ice cream or a spoonful of whipped cream. The crust should snap, the interior should be glossy and slightly jammy, and the aroma should make everyone gather around the counter.
Pro Tips
- Keep the dough cold. If it softens, pop the rounds on a tray into the fridge for 10 minutes before baking.
- Don’t overfill. Use about 1/3 cup filling per galette so the edges seal and the fruit doesn’t leak everywhere.
- Use a mix of berries for more depth: add a few raspberries or blackberries if you like.
- If your fruit seems watery, add an extra 1 tbsp cornstarch to avoid a soggy bottom.
Common Mistakes to Avoid
- Skipping preheating: Classic rookie move. It changes texture and bake time.
- Overmixing: Leads to dense or chewy results. Mix until just combined.
- Guessing cook time: Always use visual cues or a timer, not just vibes.
- Overcrowding pans: Give your food some breathing room to crisp properly.
Alternatives & Substitutions
- Use frozen strawberries and thawed rhubarb if you can’t find fresh — drain excess juice and add an extra 1 tbsp cornstarch.
- Swap granulated sugar for coconut sugar or maple syrup (use slightly less syrup, and add an extra 1 tbsp cornstarch).
- Gluten-free: use a gluten-free pie crust or make a simple almond flour crust — texture changes to more crumbly but still delicious.
- Dairy-free: use a plant-based butter and dairy-free ice cream to keep things vegan while retaining that rich mouthfeel.
Variations & Tips
- Add a pinch of ground ginger or cardamom to the filling for a warm spice note.
- Make a savory-sweet version: fold in 2 tbsp balsamic vinegar and a sprinkle of black pepper for an adult twist.
- Top with sliced almonds or oats before baking for extra crunch.
- Mini tartlets: press the rounds into a muffin tin for perfect party-ready bites.
- Creative twist: brush the finished galettes with a light honey-lemon glaze right after baking for extra shine and zing.
FAQ (Frequently Asked Questions)
- Can I make this ahead of time?
- Yes! Assemble the galettes on the baking sheet, then cover and refrigerate for up to 12 hours before baking. You can also freeze them on the tray, then transfer to a bag for up to 1 month. Bake from frozen, adding about 8–10 minutes to the time.
- Can I double the recipe?
- Sure thing. Use two baking sheets and rotate them halfway through baking for even color. Don’t crowd the oven — bake in batches if needed.
- Can I substitute butter with oil?
- Technically yes, but you’ll miss that buttery magic. Use ¾ the amount of oil if you must, and expect a slightly different crust texture — less flaky, more tender.
- How do I know it’s done?
- Look for deep golden-brown edges and bubbling filling in the center. The crust should feel firm when you tap it, and the juices should thicken as they cool. If the center still looks watery, give it a few more minutes.
- What if I don’t have ingredient X?
- No drama — swap lemon juice for a splash of orange or apple cider vinegar; swap cornstarch for an equal amount of arrowroot powder or 2 tbsp flour.
How I Like to Serve It
I serve these warm from the oven with a big scoop of vanilla ice cream and a steaming cup of coffee or a light, fruity rosé for adults. They work on a casual weeknight when you want a tiny celebration, or as a sweet ending for a summer BBQ. I sometimes pack one for a picnic — they travel well when cool, and people always ask for the recipe.
Notes
- Store leftovers in an airtight container in the fridge for up to 3 days. Reheat in a 350°F oven for 8–10 minutes to crisp the crust.
- If using meat anywhere nearby, follow safe cooking temps — chicken should reach 165°F. (Not relevant here, but a good kitchen reminder.)
Final Thoughts
Closing: Now go impress someone — or just yourself — with these little rustic beauties; warm, flaky crust and that bright strawberry-rhubarb pop will make your kitchen feel like the coziest corner of the world.