
There’s something about a warm kitchen in late October that takes over my senses — cinnamon and butter drifting like a cozy blanket, the oven quietly humming, and the snap of apples under my knife. I love this Apple Crisp Cheesecake because it feels like a hug from my own childhood: familiar, a little indulgent, and best shared. I mash together a silky cream cheese layer with a sweet-tart apple compote, then crown it with a crunchy oat crisp that crackles when you slice into it. If you want a dessert that smells like fall and eats like a celebration, this one will do the trick — weeknight magic or holiday showstopper, your call.
Quick Facts
- Yield: Serves 8–10
- Prep Time: 25 minutes
- Cook Time: 70 minutes
- Total Time: 295 minutes (includes 180 minutes chilling)
Why This Recipe is Awesome
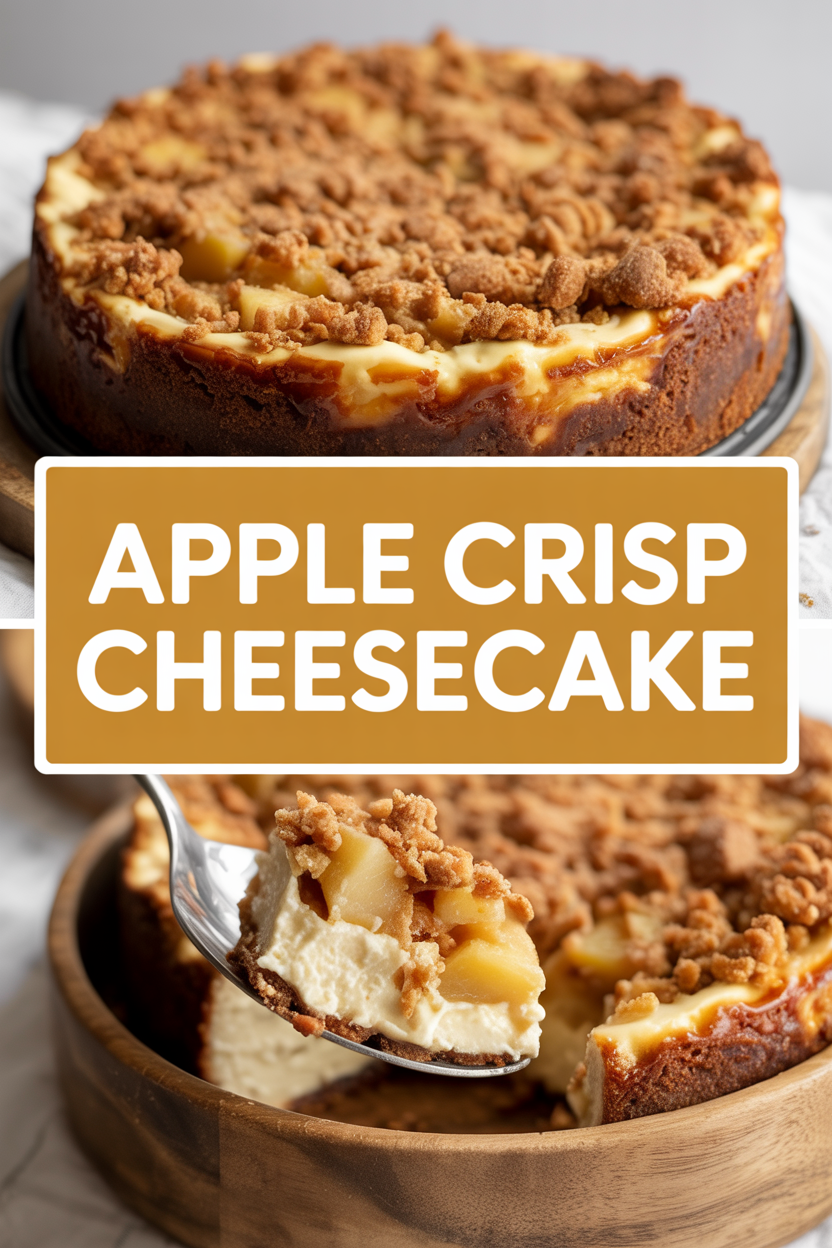
This dessert hits three textures in a single bite: a buttery, slightly crunchy crust; a smooth, tangy cheesecake center; and a crisp, cinnamon-oat topping that crackles. It tastes like apple pie and cheesecake had a delicious baby. It’s forgiving, approachable, and impressive — honestly, it’s so easy even your oven can’t mess it up. Plus, your kitchen will smell like cinnamon heaven for hours.
Ingredients
For the Main Dish:
- For the crust: 1 1/2 cups graham cracker crumbs (about 12 full sheets), 3 tbsp granulated sugar, 6 tbsp unsalted butter, melted
- For the apple layer: 3 medium apples (about 1 lb) — I like Honeycrisp or Granny Smith, peeled, cored, and diced
- 2 tbsp unsalted butter (for sautéing apples)
- 1/4 cup brown sugar, packed
- 1 tsp ground cinnamon
- 1 tsp lemon juice
- For the cheesecake: 24 oz cream cheese (room temperature), 3/4 cup granulated sugar, 2 large eggs (room temperature), 1/2 cup sour cream, 1 tsp vanilla extract, 1 tbsp all-purpose flour, 1/4 tsp salt
For the Sauce / Garnish (if applicable):
- For the apple crisp topping: 3/4 cup rolled oats, 1/2 cup all-purpose flour, 1/2 cup packed brown sugar, 1/2 tsp ground cinnamon, 6 tbsp unsalted butter, cold and cubed
- Optional: 1/2 cup salted caramel sauce (store-bought or homemade) for drizzling
How I Make It
Step 1:
Preheat the oven to 325°F. Press the graham crumbs mixed with 3 tbsp sugar and 6 tbsp melted butter into the bottom (and slightly up the sides) of a 9-inch springform pan. I use the bottom of a measuring cup to get a compact, even crust. Bake the crust for 8–10 minutes until it smells toasty and looks set. Let it cool while you make the filling.
Step 2:
In a skillet, melt 2 tbsp butter over medium heat. Add the diced apples, 1/4 cup brown sugar, 1 tsp cinnamon, and 1 tsp lemon juice. Sauté for about 6–8 minutes until the apples soften but keep some bite — they should look glossy and smell warmly spiced. Scoop the mixture onto a plate to cool slightly.
Step 3:
Beat the 24 oz cream cheese with 3/4 cup sugar until smooth and creamy (no lumps). Beat in the eggs one at a time, then stir in 1/2 cup sour cream, 1 tsp vanilla, 1 tbsp flour, and 1/4 tsp salt. Spread half the batter over the cooled crust, then spoon the sautéed apples in an even layer. Dollop the remaining batter over the apples and gently smooth to cover. You’ll catch whiffs of vanilla and cinnamon here — delicious.
Step 4:
Bake the cheesecake at 325°F for about 60–70 minutes. Look for edges set and a slight jiggle in the center — the center will finish firming as it cools. Turn off the oven, prop the door open with a wooden spoon, and let the cake rest inside for 30 minutes (this helps prevent cracks). Then remove and cool to room temperature before chilling for at least 180 minutes (overnight is best).
Step 5:
While the cheesecake chills, make the crisp topping. Combine 3/4 cup oats, 1/2 cup flour, 1/2 cup brown sugar, and 1/2 tsp cinnamon. Cut in 6 tbsp cold cubed butter until the mixture clumps. Spread on a baking sheet and bake at 350°F for 12–15 minutes until golden and crunchy. Cool slightly, then sprinkle over the chilled cheesecake. Drizzle with warm caramel if you like. Let the crisp sit for 10 minutes so it adheres, then slice and serve.
Pro Tips
- Bring your cream cheese and eggs to room temperature for a silky filling and fewer lumps.
- Don’t overbake — the center should still jiggle slightly. It will set as it cools.
- Make the crisp ahead and store in an airtight container; it keeps its crunch for a couple of days.
- Run a thin knife around the pan before unlatching to prevent tearing the crust when you release the springform.
Common Mistakes to Avoid
- Skipping preheating: Classic rookie move. It changes texture and bake time.
- Overmixing: Leads to dense or chewy results. Mix until just combined.
- Guessing cook time: Always use visual cues or a timer, not just vibes.
- Overcrowding pans: Give your food some breathing room to crisp properly.
Alternatives & Substitutions
- Use gingersnap crumbs instead of graham crackers for a spicier crust — you’ll get more warmth and complexity.
- Swap sour cream with full-fat Greek yogurt for a tangy, slightly lighter filling (texture changes minimally).
- For a dairy-free option: use dairy-free cream cheese and coconut yogurt; use coconut oil instead of butter for the crust (crisp texture softens slightly).
- For gluten-free: use certified gluten-free oats and a gluten-free graham/cracker for the crust — flavor stays similar, texture varies a bit.
Variations & Tips
- Add toasted pecans or walnuts to the crisp for extra crunch and a nutty flavor.
- Stir 2 tbsp maple syrup into the apple layer for a deeper, autumnal sweetness.
- Swap apples for pears and add a splash of brandy for an adult twist.
- Make mini cheesecakes in a muffin tin for single-serve, portable desserts.
- For a gooey center: swirl a ribbon of caramel into the cheesecake batter before baking.
- Make it kid-friendly by skipping booze and adding chocolate chips to the crust for fun.
FAQ (Frequently Asked Questions)
- Can I make this ahead of time?
- Yes! Bake the cheesecake a day ahead and chill overnight. Bake the crisp topping earlier in the day and add just before serving to keep it crunchy. Store cheesecake covered in the fridge for up to 3 days.
- Can I double the recipe?
- Sure thing. Use two 9-inch pans or a 10×15 pan. Expect similar bake times for individual pans; a larger pan may need an extra 10–15 minutes.
- Can I substitute butter with oil?
- Technically yes, but you’ll miss that buttery magic. Use ¾ the amount of oil if you must, and expect a slightly softer, less flaky texture.
- How do I know it’s done?
- Look for set edges and a center that jiggles like pudding — not liquid. A thin crack here and there is fine; the center firms as it cools. If you use a thermometer, aim for an internal temp around 150–155°F at the center.
- What if I don’t have ingredient X?
- Out of apples? Use pears or an equal amount of mixed frozen berries (thaw and drain). No sour cream? Use full-fat Greek yogurt. No graham crackers? Use digestive biscuits or finely crushed vanilla wafers.
How I Like to Serve It
I serve this warm-scented cheesecake with a drizzle of caramel and a light dusting of cinnamon — sometimes a scoop of vanilla ice cream if I’m feeling decadent. It shines at holiday dinners, potlucks, or a cozy Sunday dessert. Pair it with coffee, a late-afternoon tea, or a glass of dessert wine for a special touch.
Notes
- Store leftovers covered in the refrigerator for up to 3 days; the crisp softens over time, so store separately if possible.
- Bring slices to room temperature for 15–20 minutes before serving for the best mouthfeel.
Final Thoughts
Closing: Go make this Apple Crisp Cheesecake — and then sit down, listen to the crisp topping crackle, and enjoy a well-earned slice. You’ve got this.